|
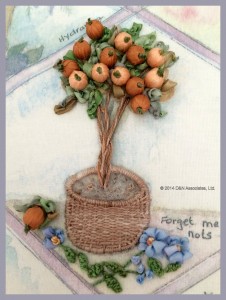
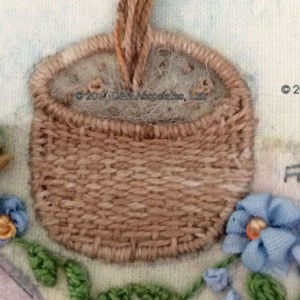
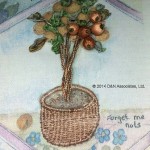
The weaved basket: (Stitched using Perle 8, Sea Sands, color number 70 purchased from Di van NieKerk website).
Directions suggested to work the basket on an extra piece of material, snipped it off when done stitching and then couch onto the main fabric leaving bottom open in order to place stuffing in to slightly bulge the basket from the main fabric. I decided up front I didn’t want to padded this basket to be up from the main fabric so I decided to stitch weave the basket directly onto the main fabric. I couched a thin, white cotton wrapped wire around the outer sides of the basket (following the sketched on basket of the printed fabric to provide the form of the basket). I wanted the top oval rim of the basket to appear thicker then the weaved sides so I did a double couched oval of the wire for the top rim. Once I had the wire couched I did the long straight stitches to form the vertical lines of the basket. Using a blunt ended needle I worked the woven filling stitch to weave the basket. I finished the basket by going around the rim and sides doing a slanted wrapped over (the wires) stitch with the perle thread. |
|
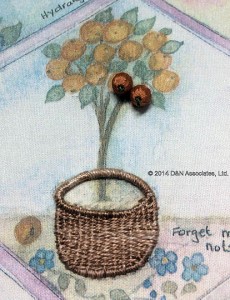
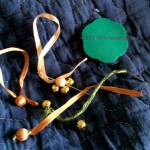
The Oranges: The design’s instructions called to wrap beads in 2mm silk ribbon but I decided to use 4mm.I wrapped YLI 4mm silk ribbon (colors 107 and 39) around and through the center holes of individual 6mm gold plated corragrated metal beads purchased from Fire Mountain Gems. The third photo to the right show close ups of the beads as I worked on them. I used four strands of Gloriana stranded silk, Granny Smith Green(053) with a French knotted end to stab a stitch through the center hole of the bead and fasted it through to the back of the fabric. The French knot end creates the green end of the oranges. As I worked I left the unused end of the silk ribbon alone until I stabbed the green silk thread through, then I snipped the silk ribbon off close to the bead. After fastening two oranges onto the printed fabric I decided to go ahead and create the other twelve oranges but to wait until I have finished the trunk and adding leaves before fastening rest of oranges onto the fabric. |
|
The Orange Tree’s Trunk:
The design’s instructions suggested wrapped wire for the trunk but I felt there would be a bulge over the rim of the basket so I decided to use twisted strands of Perle thread for the trunk. Using two strands of the Perle 8 Sea Sands (color 70) which had been used for the basket and two strands of Perle 8 Desert Sands (color number 25), I twisted them and create the Orange Tree’s trunk. From another project I had gray painted poly-filled material. I took just a very small among of this dyed poly fill and using a single strand of Perle 8 Rustic Brick (color number 66) I did seed stitches to secure the poly fill within the inner top area of the basket. |
|
The Forget Me Nots:
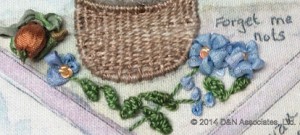
The single orange and its leaves are created same as I wrote about above in the Orange section. The design’s instruction called to use 4mm silk ribbon for the leaves and stems around the Forget Me Nots but I wanted a lighter look and decided to make bunchy looking small leafs using single strand of Caron’s Wildflowers Spearmint (color number 257) using a modified picot stitch. The loopy Forget Me Not petals were created using a light blue 4mm silk ribbon. The eye of the flowers were done using a single strand of Dinky Dyes perle 8 Outback (color number 28). |

