
Hardanger Christmas tree pattern, based on a Kreinik freebie design. When worked on 22 count this design just fits an oval shape cut-out window of the purchased card that I used.
Web searching for freebie patterns I found the below shown Kreinik Christmas Tree Design and downloaded the pdf from http://www.kreinik.com/shops/Hardanger/.
The right photo is from the Kreinik website for this design. The left photo is my take on the design. I wanted more eyelets at the top of the tree. Comparing the eyelet and Kloster block placements to each other on these two photos will show you how I changed the design.

Supplies that I used:
Fabric: Zweigart’s 22 count Fine Ariosa fabric, Christmas Red.
Threads:
– Anchor perle size 5, color 212 (Spruce Dark)
– Accentuate #42, two strands of this sparkling silver color blending metallic filament (it comes on a spool).
The 5 x 7 inch tri-fold green card has 3 1/2 x 5 inch oval opening. The card was purchased on the 123stitch website.
I used double sided stitchery tape to secure the fabric onto the card.
Stitches used: Buttonhole (or blanket) stitch) for the edge, Hardanger Kloster blocks, bar weaving, eyelet stitch and I added two small Rhodes stitches.
The downloaded pdf suggested to start at the top. I decided to start towards the bottom (white arrow on the left photo) because at that place on the design there was a three-sided Kloster block that would set me up for positional placements of the other Kloster blocks as I stitched.
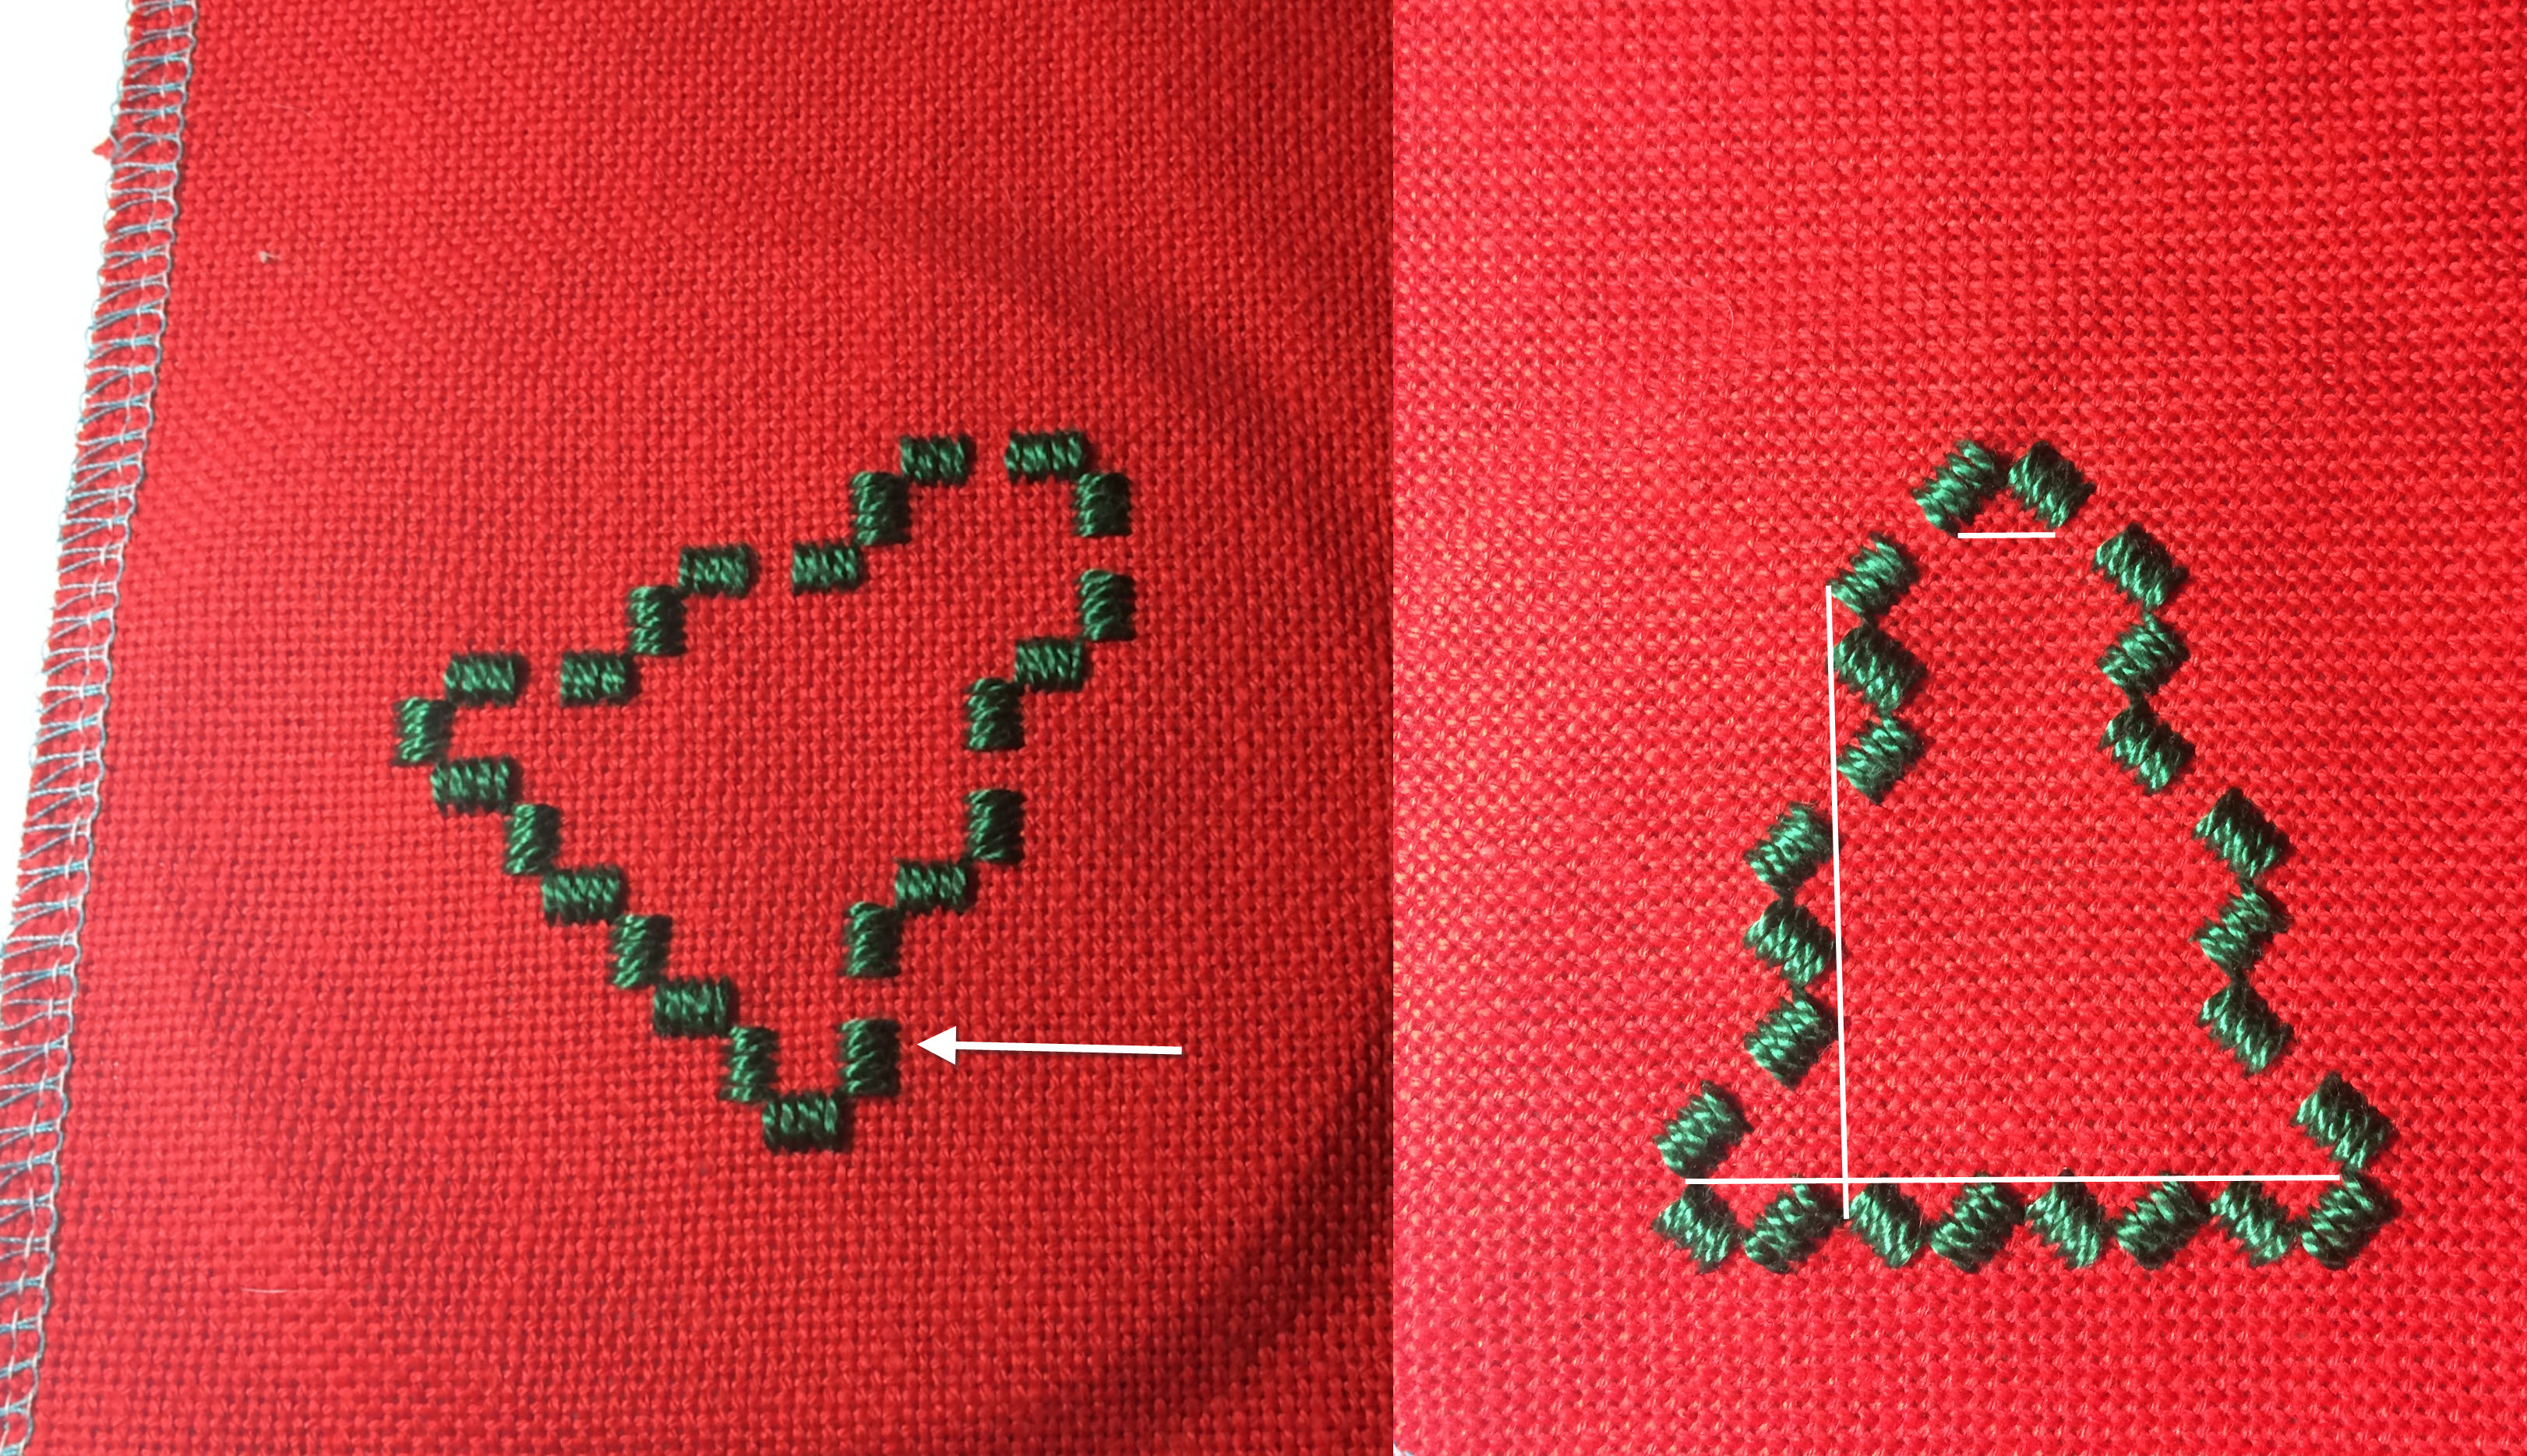
As shown in the left photo, you work this design on the diagonal. The right photo shows how the design will look when the bottom line of Kloster blocks are placed on a horizontal plane.
There are several neat things about Kloster blocks. One is they enable us to do cutwork, which is part of this tree’s design. Another thing is Kloster blocks are great for helping you stay on pattern. On the above right photo I have drawn several white lines to emphasize places where you can check the positional alignment to determine that you are adhering to the pattern.

The fabric threads have been snipped and pulled out to ready this sample for bar weaving. If you want to give cutwork a try or just are not quite comfortable yet with snipping the threads away I have written a few articles with lots of photos. You can view these by clicking the upper navigation button named Hardanger at my website NoelleFrancesDesigns.com.
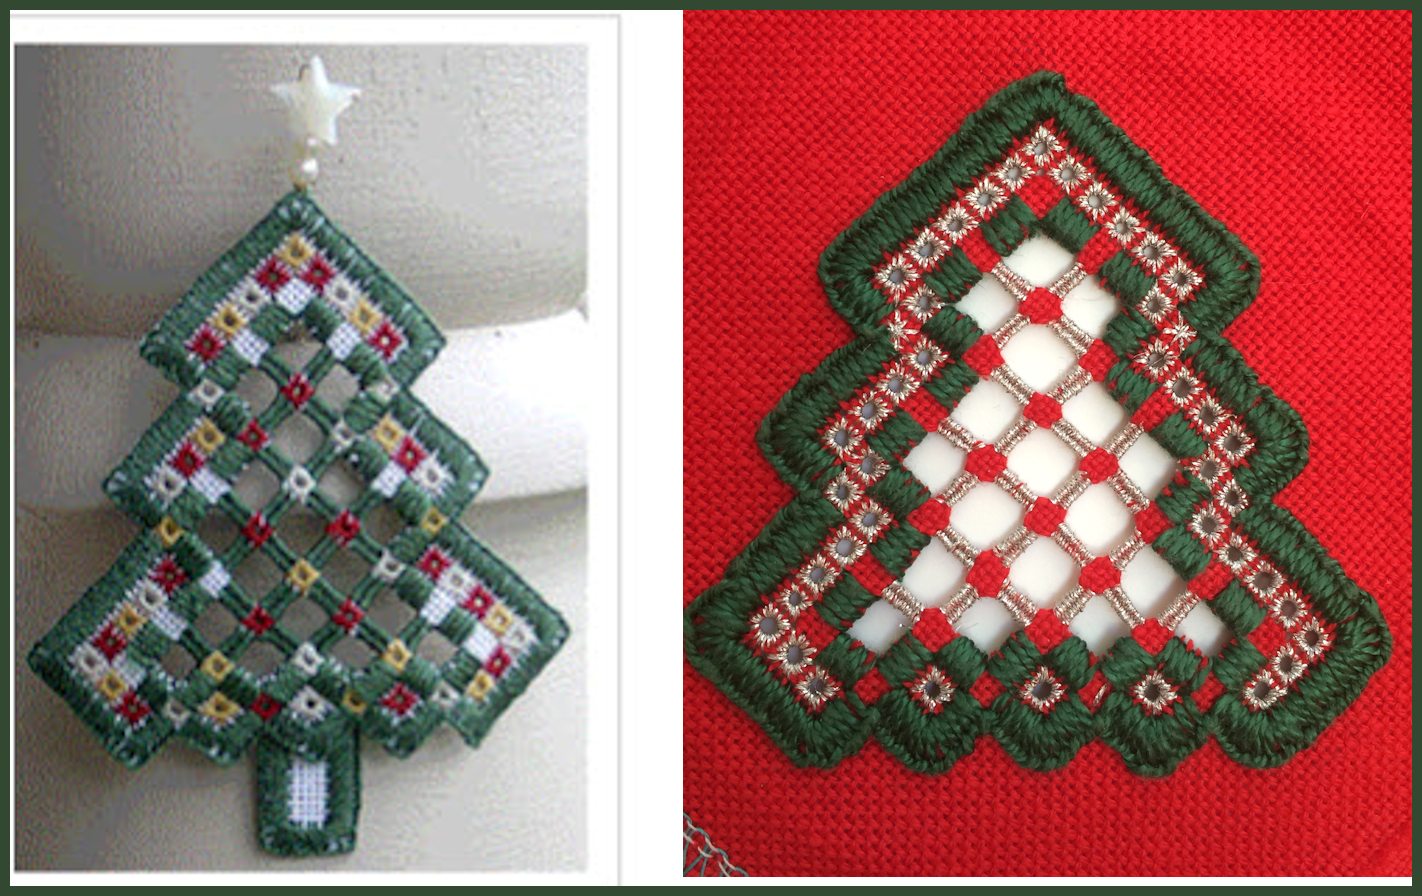
I plan to use my worked piece as an insert into a Christmas card. They finished theirs as a hanging ornament in that they added a trunk, a top star and snipped exterior unused fabric away (along the buttonhole finished edge). Also they did eyelets within their center bar weaved area.
If you have an interest in determining how I changed the design count the eyelets along each indent. At the top, their worked piece has five eyelets on each side. My worked piece has six eyelets on each side and so on down comparing each indent area.
As I wanted to use my worked piece as a card insert I had to decide what color card to use. With paper cardboard cards you can always spray paint them (lightly) to change the color. Here are the insert colors that I considered.
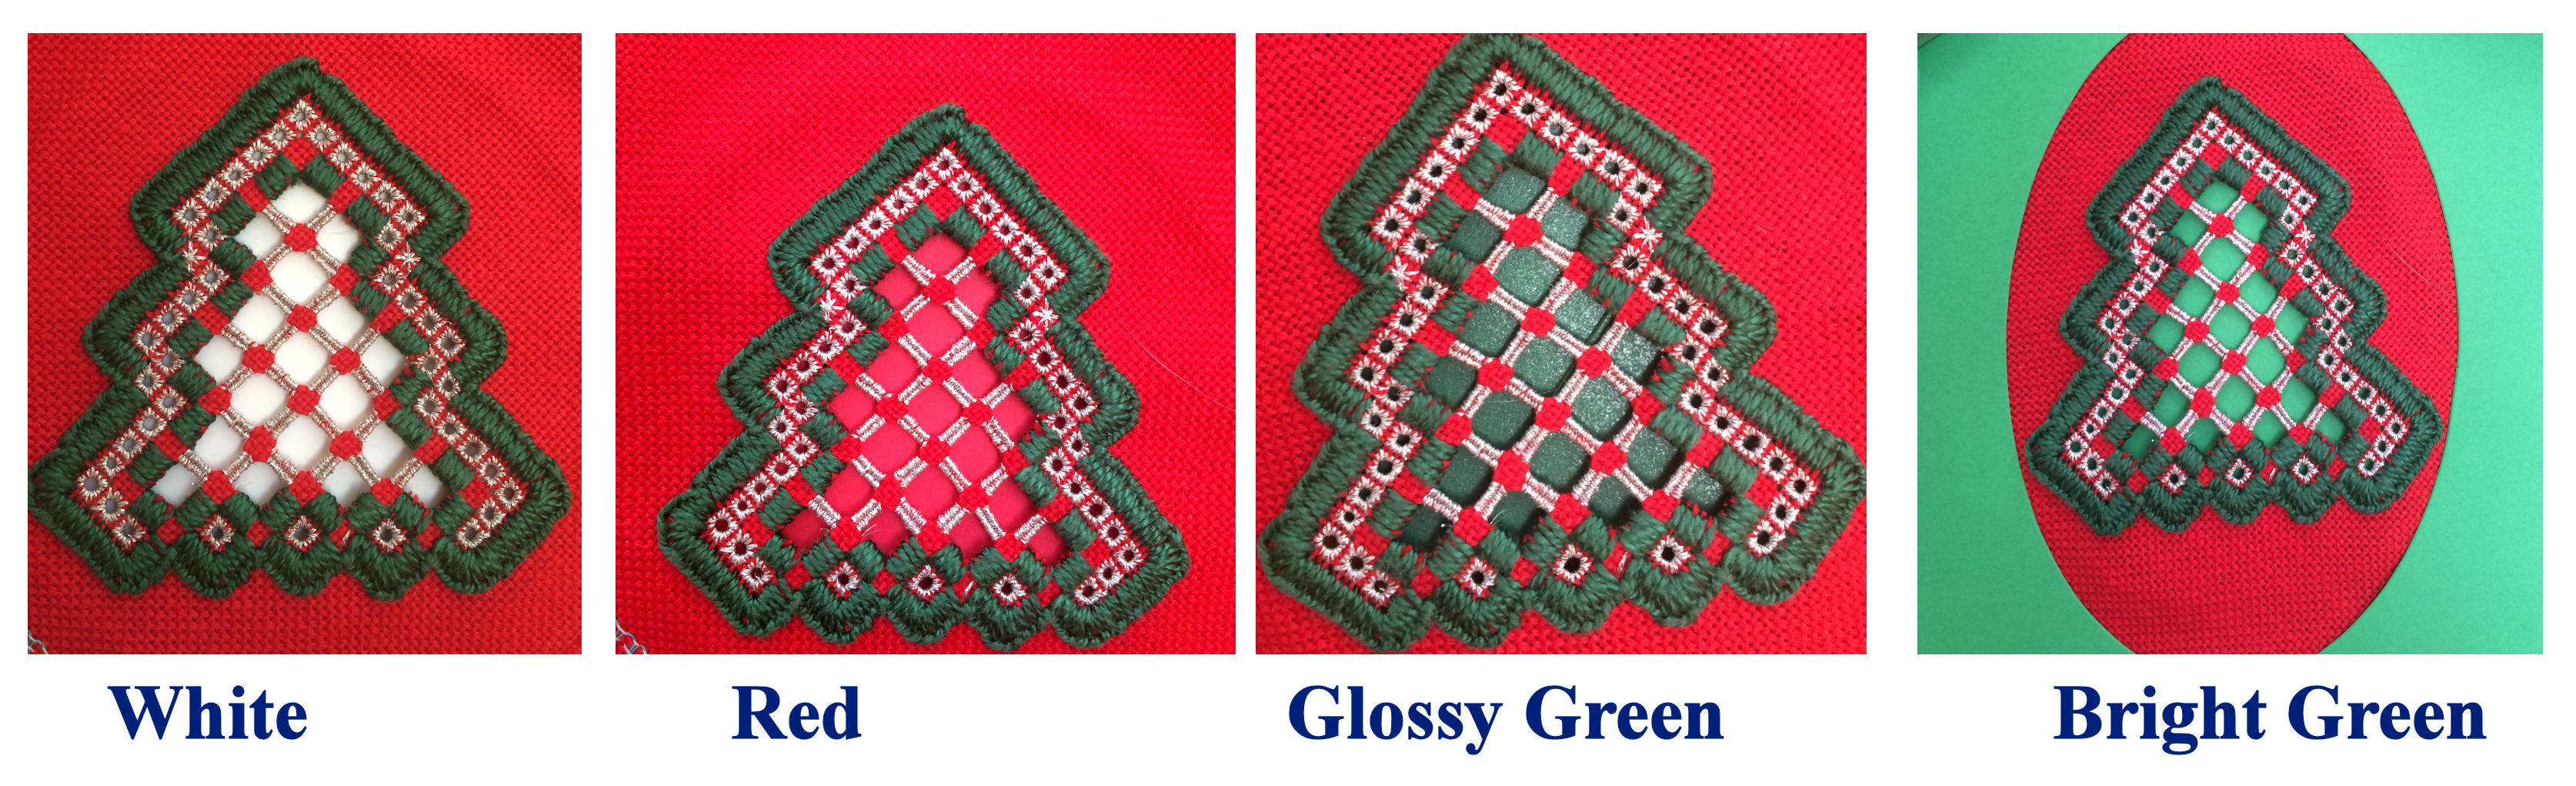
I liked the bright green showing through behind the openwork of the Christmas tree and decided, for contrast, to spray paint the front of the card a glossy darker green.


Friends of mine use glue, but I like to use double sided stitchery tape for securing a worked piece into a window card.
Double sided stitchery tape is thin and extremely sticky. You can move it around (a little bit) on the unstitched surface of the worked fabric but once the sticky side of this thin tape touches a paper surface it is adhered.
As you unroll the tape one side will have a heavy strip of paper, leave that on as you work. Once ready, you remove the heavy strip of paper by lifting a corner and then carefully pull the heavy paper strip off of the sticky tape.