
This blog page is a brief discussion of how I created my second quilt, my All Aglow 68- by 115-inch lap size quilt. I assume you are either comfortable with the various stages of creating a quilt, or like me, you viewed several different web videos as you learn your way through quilting.
Names of the fabric are listed below but not the quantity that I purchased as I did not have a pattern but just sewed rectangles together.
The thread that I used: 50wt Aurifil.2783 (Medium Delft Blue)
This blog page presents the widths of the strips that I used and how I did the corners.
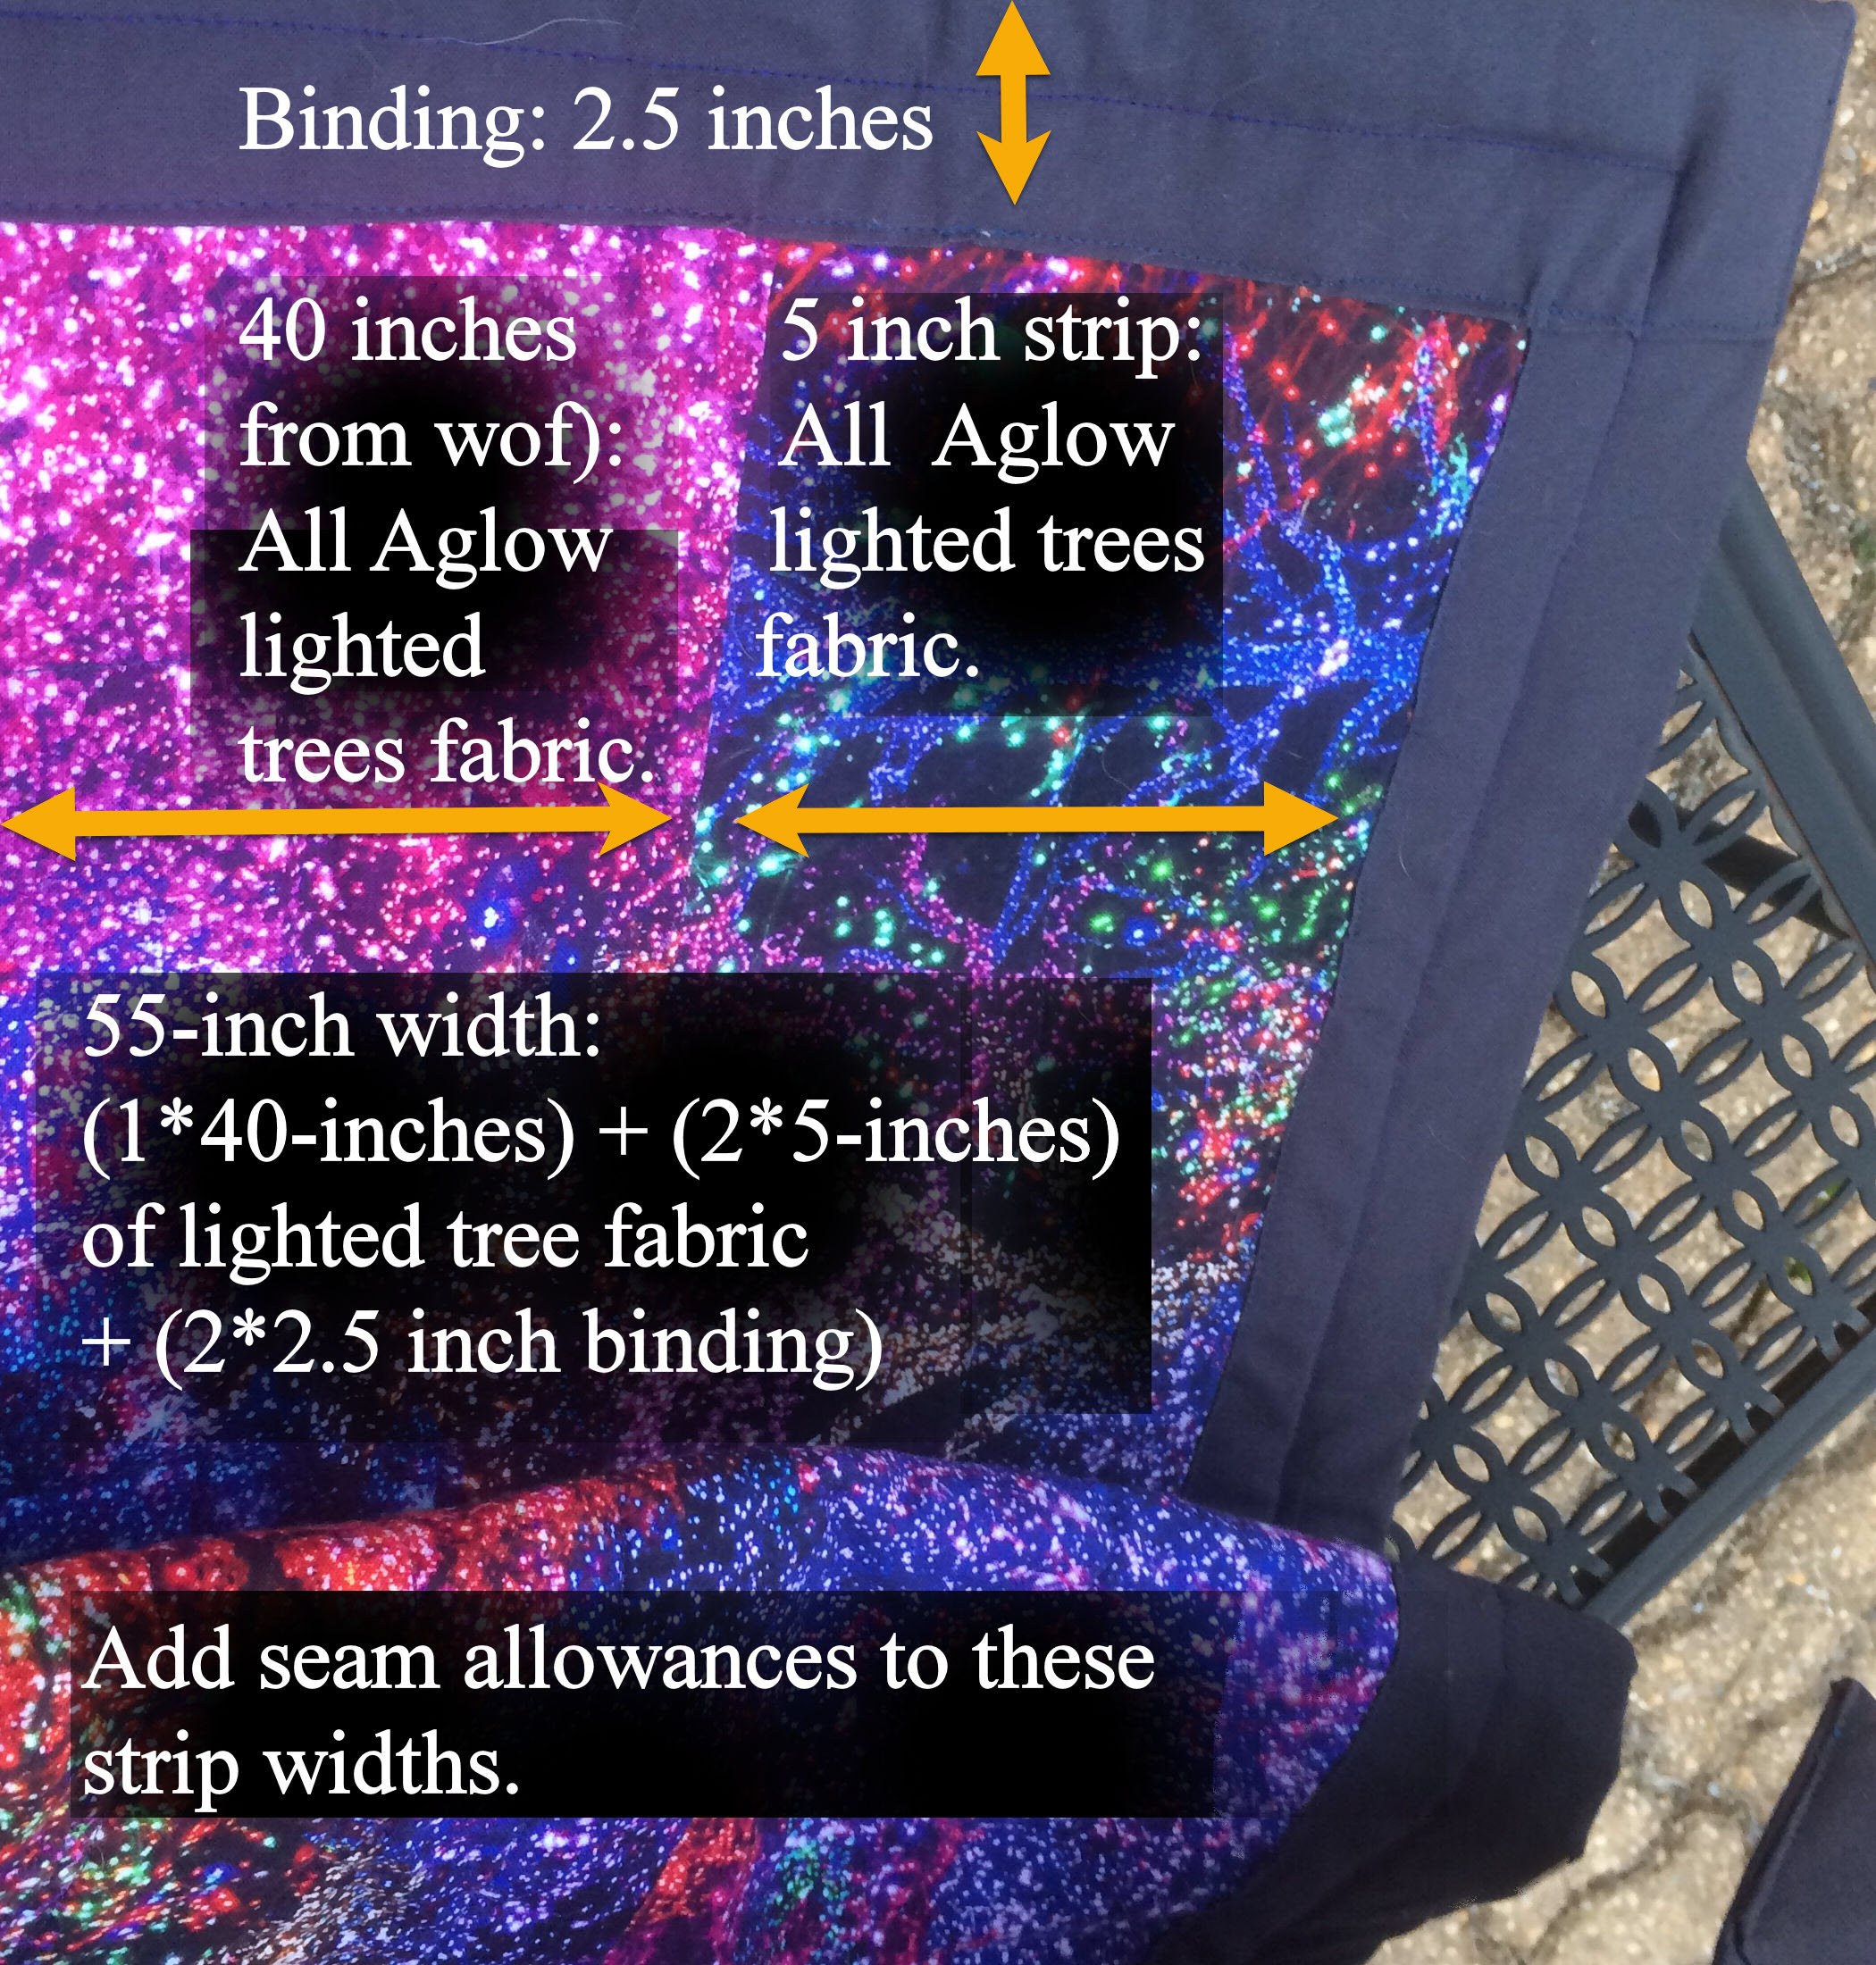
The front side’s rectangles are the main All Aglow panel, five strips along each side of the panel and then the binding strip.
The back side’s rectangles are the large piece of All Aglow Tree fabric and a strip of the All Aglow Tree fabric along two sides of the larger piece.
Seam allowances: Seam allowances on the front piece are quarter inch. Half inch seam allowances for the back piece and binding.
| Click any of the photos to view a larger image. |


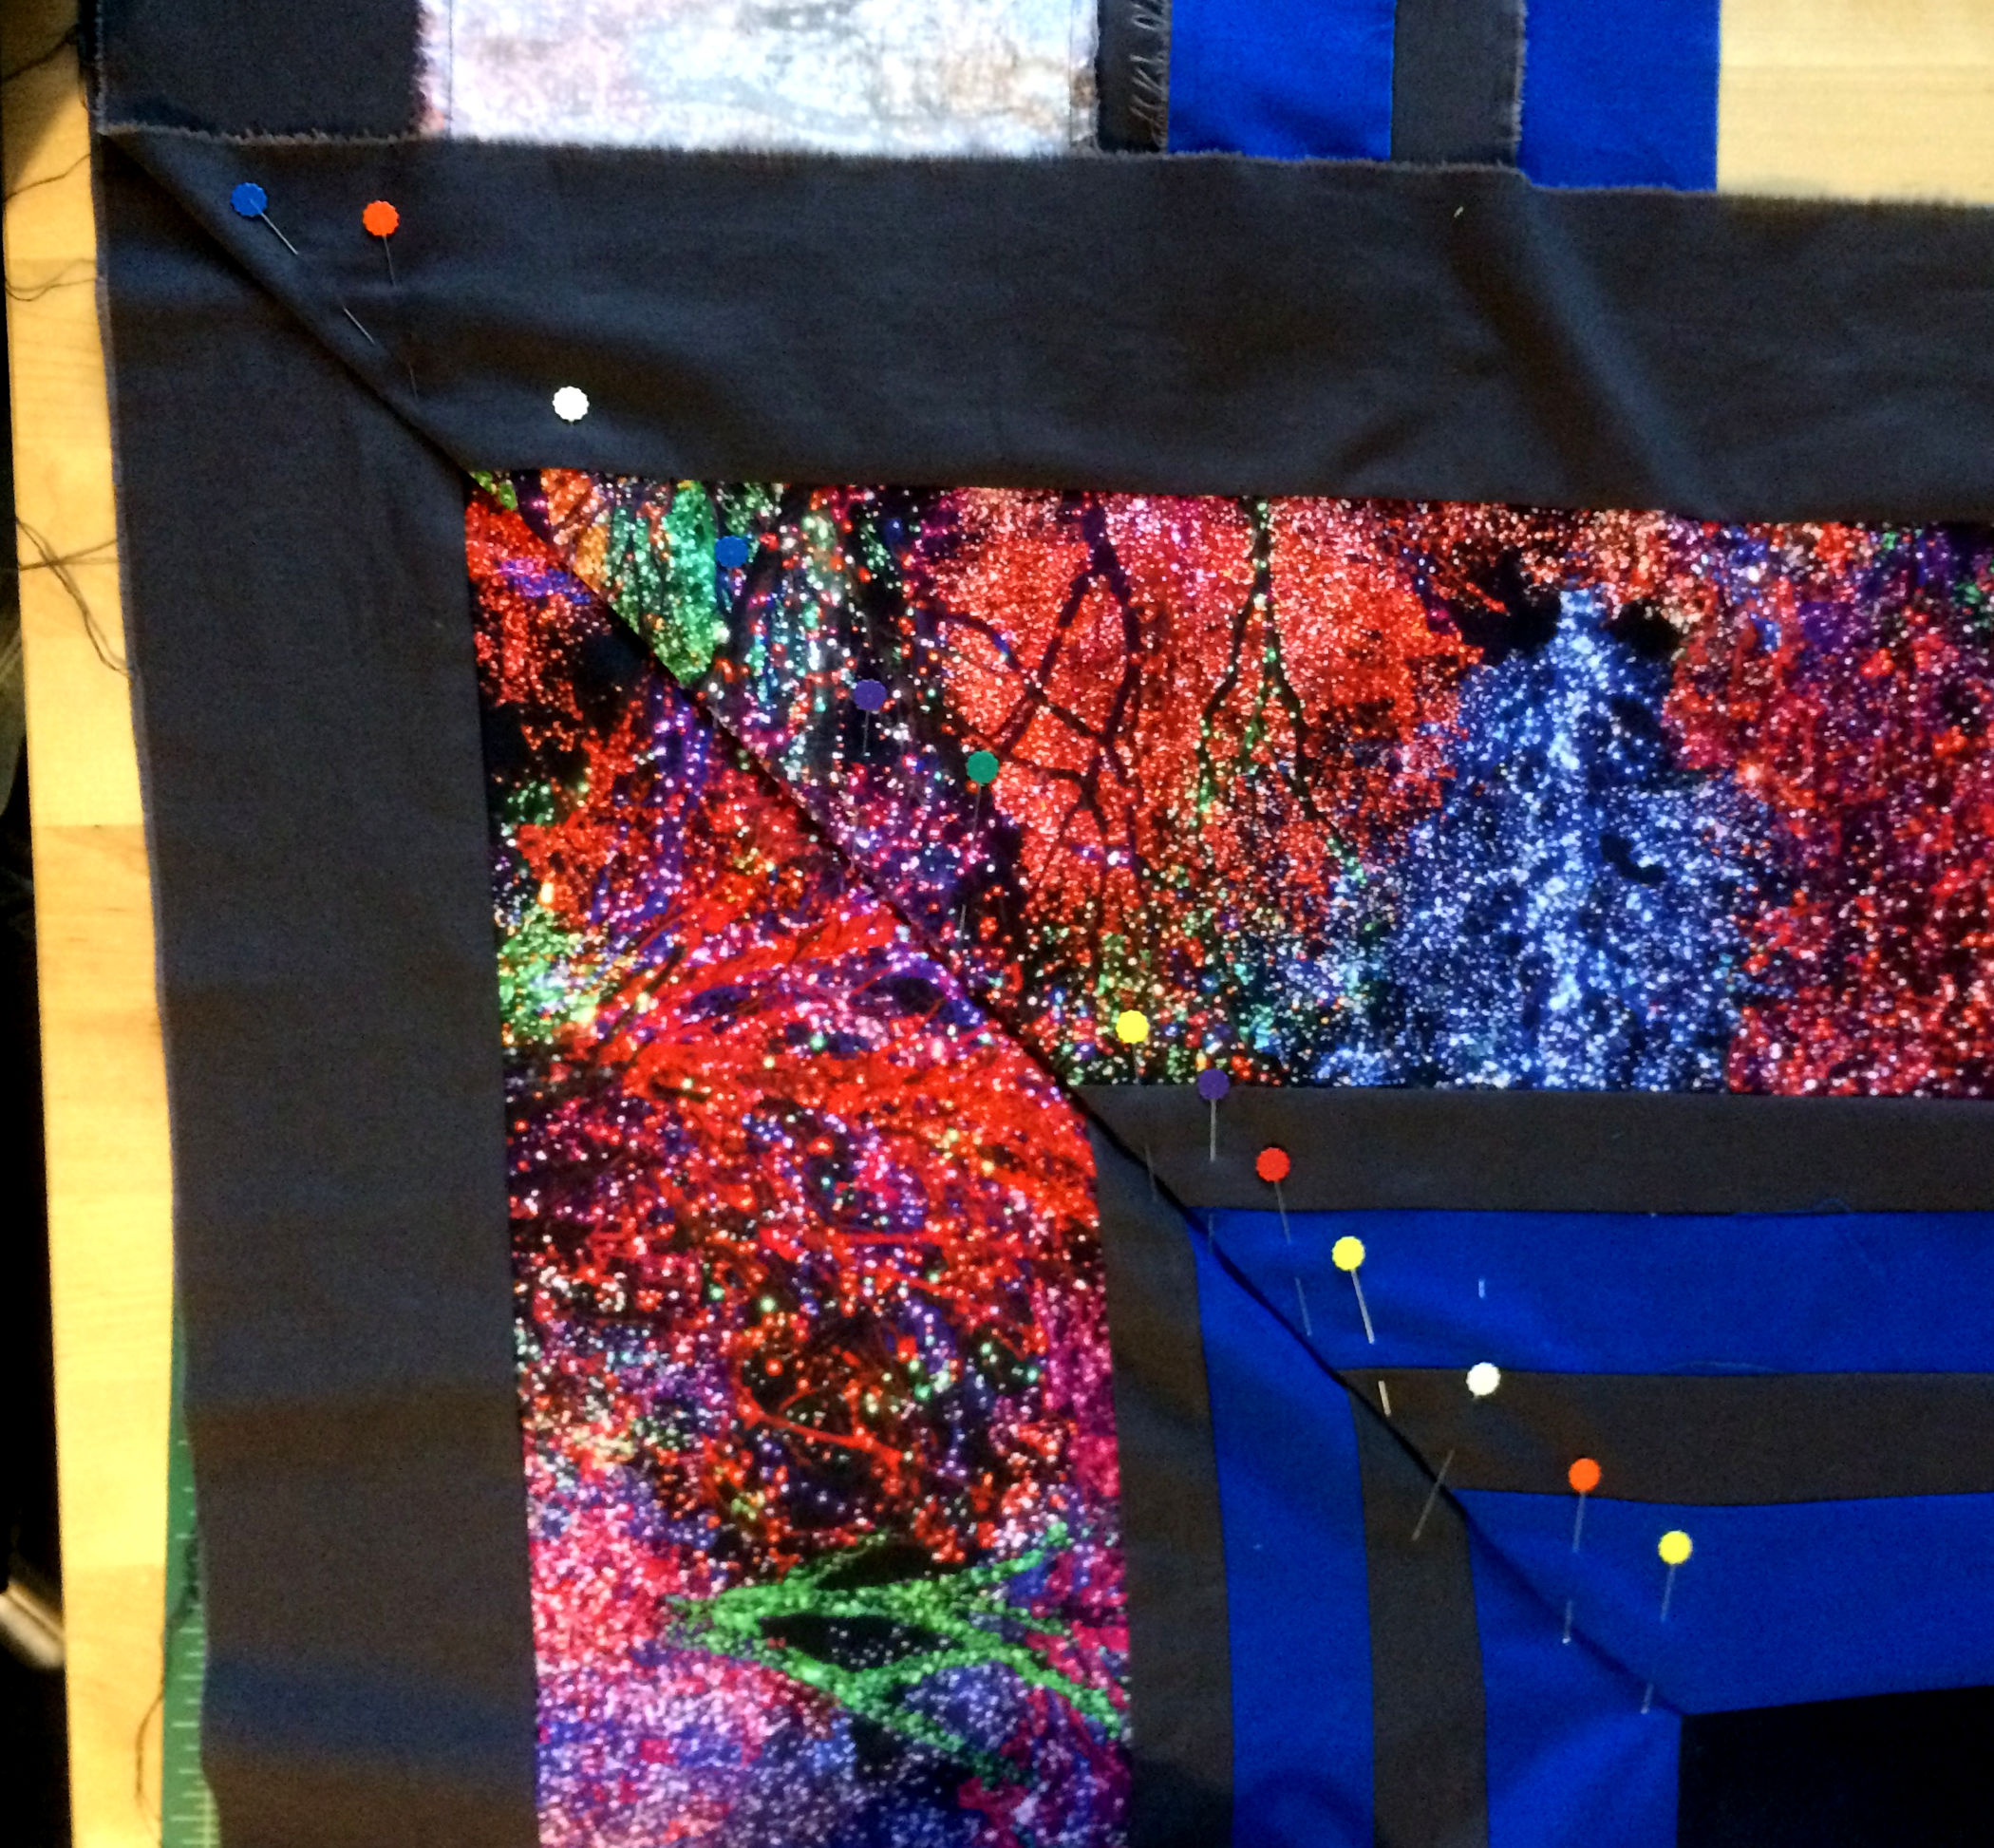
 One thing that did take up a bit of fabric was my decision to do mitered (mitred) or 45-degree corners. For what I call “the standard way to” mitered corners view Mary Corbet’s website: https://www.needlenthread.com/2009/06/tutorial-mitred-corners-on-linen-square.html. This “standard” approach takes a lot less fabric, but I find it takes a lot longer time for me to get it right.
Below is brief discussion of how I work mitered corners. |
For this quilt I sewed five strips along each side of the panel.
When cutting fabric for this border each strip has added length to enable me to do the folded 45-degree turned corner.
After the corner fabric is turned and pinned, top stitch along the fold starting at a corner of the panel, along the fold and out to the outer edge.
 Finishing the Sandwich (front, batting, back): Working on the front side I stitched (through all layers of the sandwich) in-the-ditch along each seam. I know this isn’t a strong quilting (I pressed my seams open) but I will only be using this quilt during the winter holiday season. So should be little stress on the seams and I do not plan to wash the quilt (famous last words before someone spills a bowl of soup or cereal near me!). Binding: I like to leave my binding “undone” until I get the quilting (throughout the sandwich) sewing completed. Then I check to make sure the quilt stitching has not pulled the overall quilt out of square. Once that check is completed: Along the raw edge of the binding, turn over half inch and iron that folded over fabric. I pin then machine stitch the binding.
|