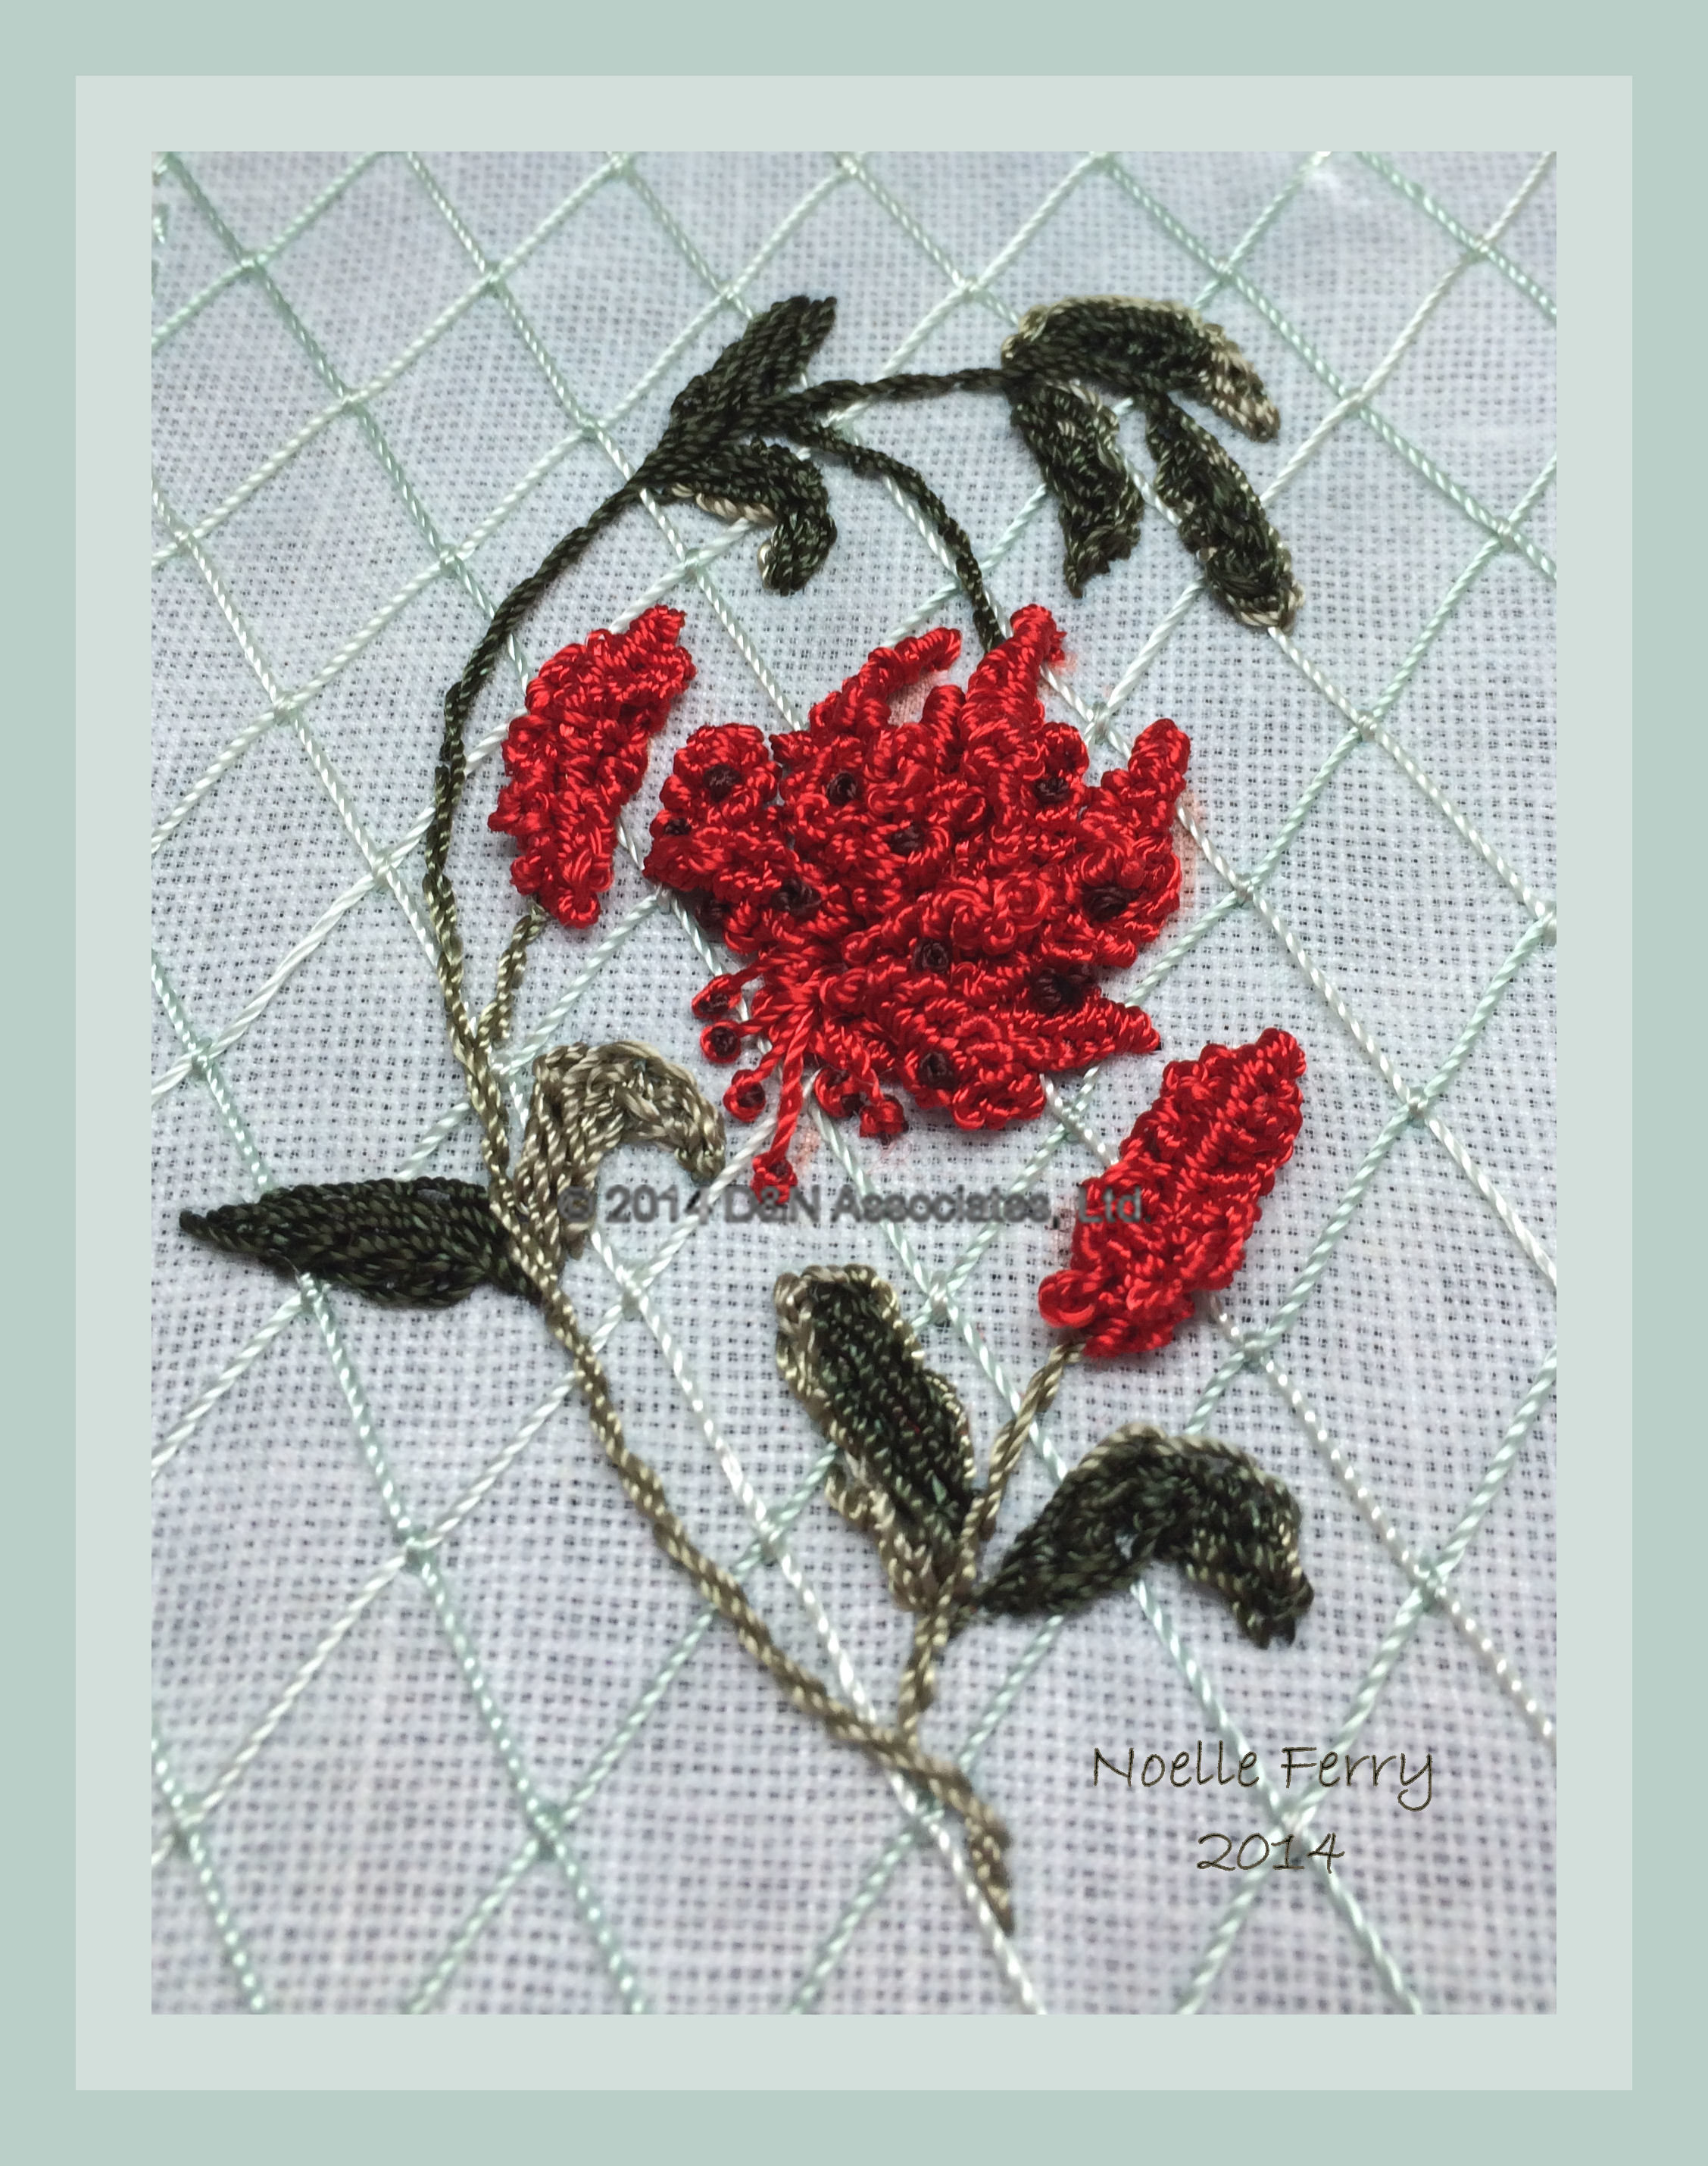
Designer is Loretta Holzberger. This tiger lily design with a stitched diamond grid background was downloaded as a pdf file. The brilliant flowers are worked in knotted double cast-on stitches. Stitched area is approximately 4 x 6 inches.
I printed a slight outline of the flowers, stems and leaves onto a printable fabric (Extrav Organza Silk For Inkjet Printing).
Last year I purchased a kit of Ms. Holzberger’s design Swing Time Fuchsia (ordered from stitchingshop.com). Her Swing Time Fuchsia will be my first stumpwork (I just started working on it). I purchased the kit because it gave me everything I needed to do the stumpwork and BE stitching. If ordering from Loretta Holzberger’s web page read her comments at the top of the page about ordering more than two pdf files at a time using PayPal payment. You can view my finished worked Swing Time Fuchsia here.
For the threads of this Tiger Lily design I used Ed Mar Lola 200 (flowers), Lola 029 (leaves, stems) and Lola 042 for the lattice.
Only thing I would had done differently is used a lighter weight thread for the lattice but in the actually worked piece the weight of the lattice’s Lola thread looks Ok.
I plan to do this design again with steamed Edmar rayon thread so that it won’t be curly. But I think I am going to like the wilder look of the unsteamed thread that I used here.
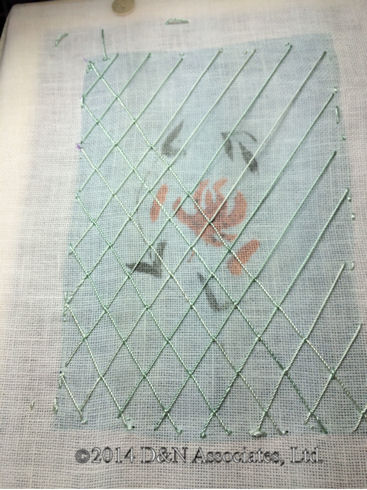
I printed a slight outline of the flowers, stems and leaves onto a fabric bonded onto paper. I also added a texture looking background to the image I made up for printing. Note this photo shows that the texture for the background (of the image) didn’t show much when printed onto the fabric and also the dots that form an oval around the design area didn’t show when printed. These dots were for marking locations for the lattice but it actually worked out best for me to use a ruler as I stitched the lattice lines.
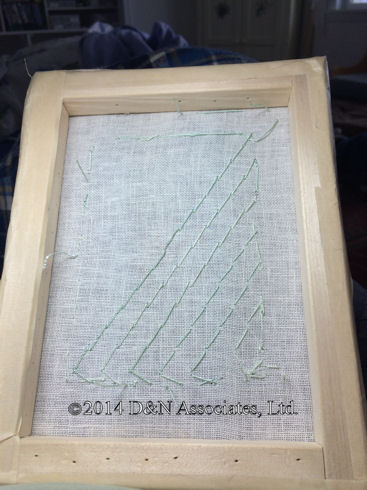
This photo shows the thin printed organza fabric (removed from the bonding paper that got it through the printer). I used a 30 count evenweave fabric as a backing fabric. In this photo I am working on stitching the lattice(using a ruler to get the lattice lines evenly spaced).
When I first removed the printed organza fabric from the bonding paper I was very disappointed in how light weight the printed organza fabric was (because I really dislike basting). I knew I had to use a backing fabric but the top (printed) fabric was too light to embroider on without basting it to the backing fabric. Luckily for me this design called for a lattice background (to be stitched first) and that nicely adhered my front organza fabric to the backing evenweave one so that the design won’t skew as I stitched. At the end of each diagonal lattice line I did one or two small stitches to just secure the thread to give me a taut but not overly tight lattice line.
The diagonal thread stitching you see on the back of this worked piece is for the tiny stitch (on the front) that is worked at each point of the diamond shaped lattice. (You can view the close up of the diamond shaped lattice at the top of this page).