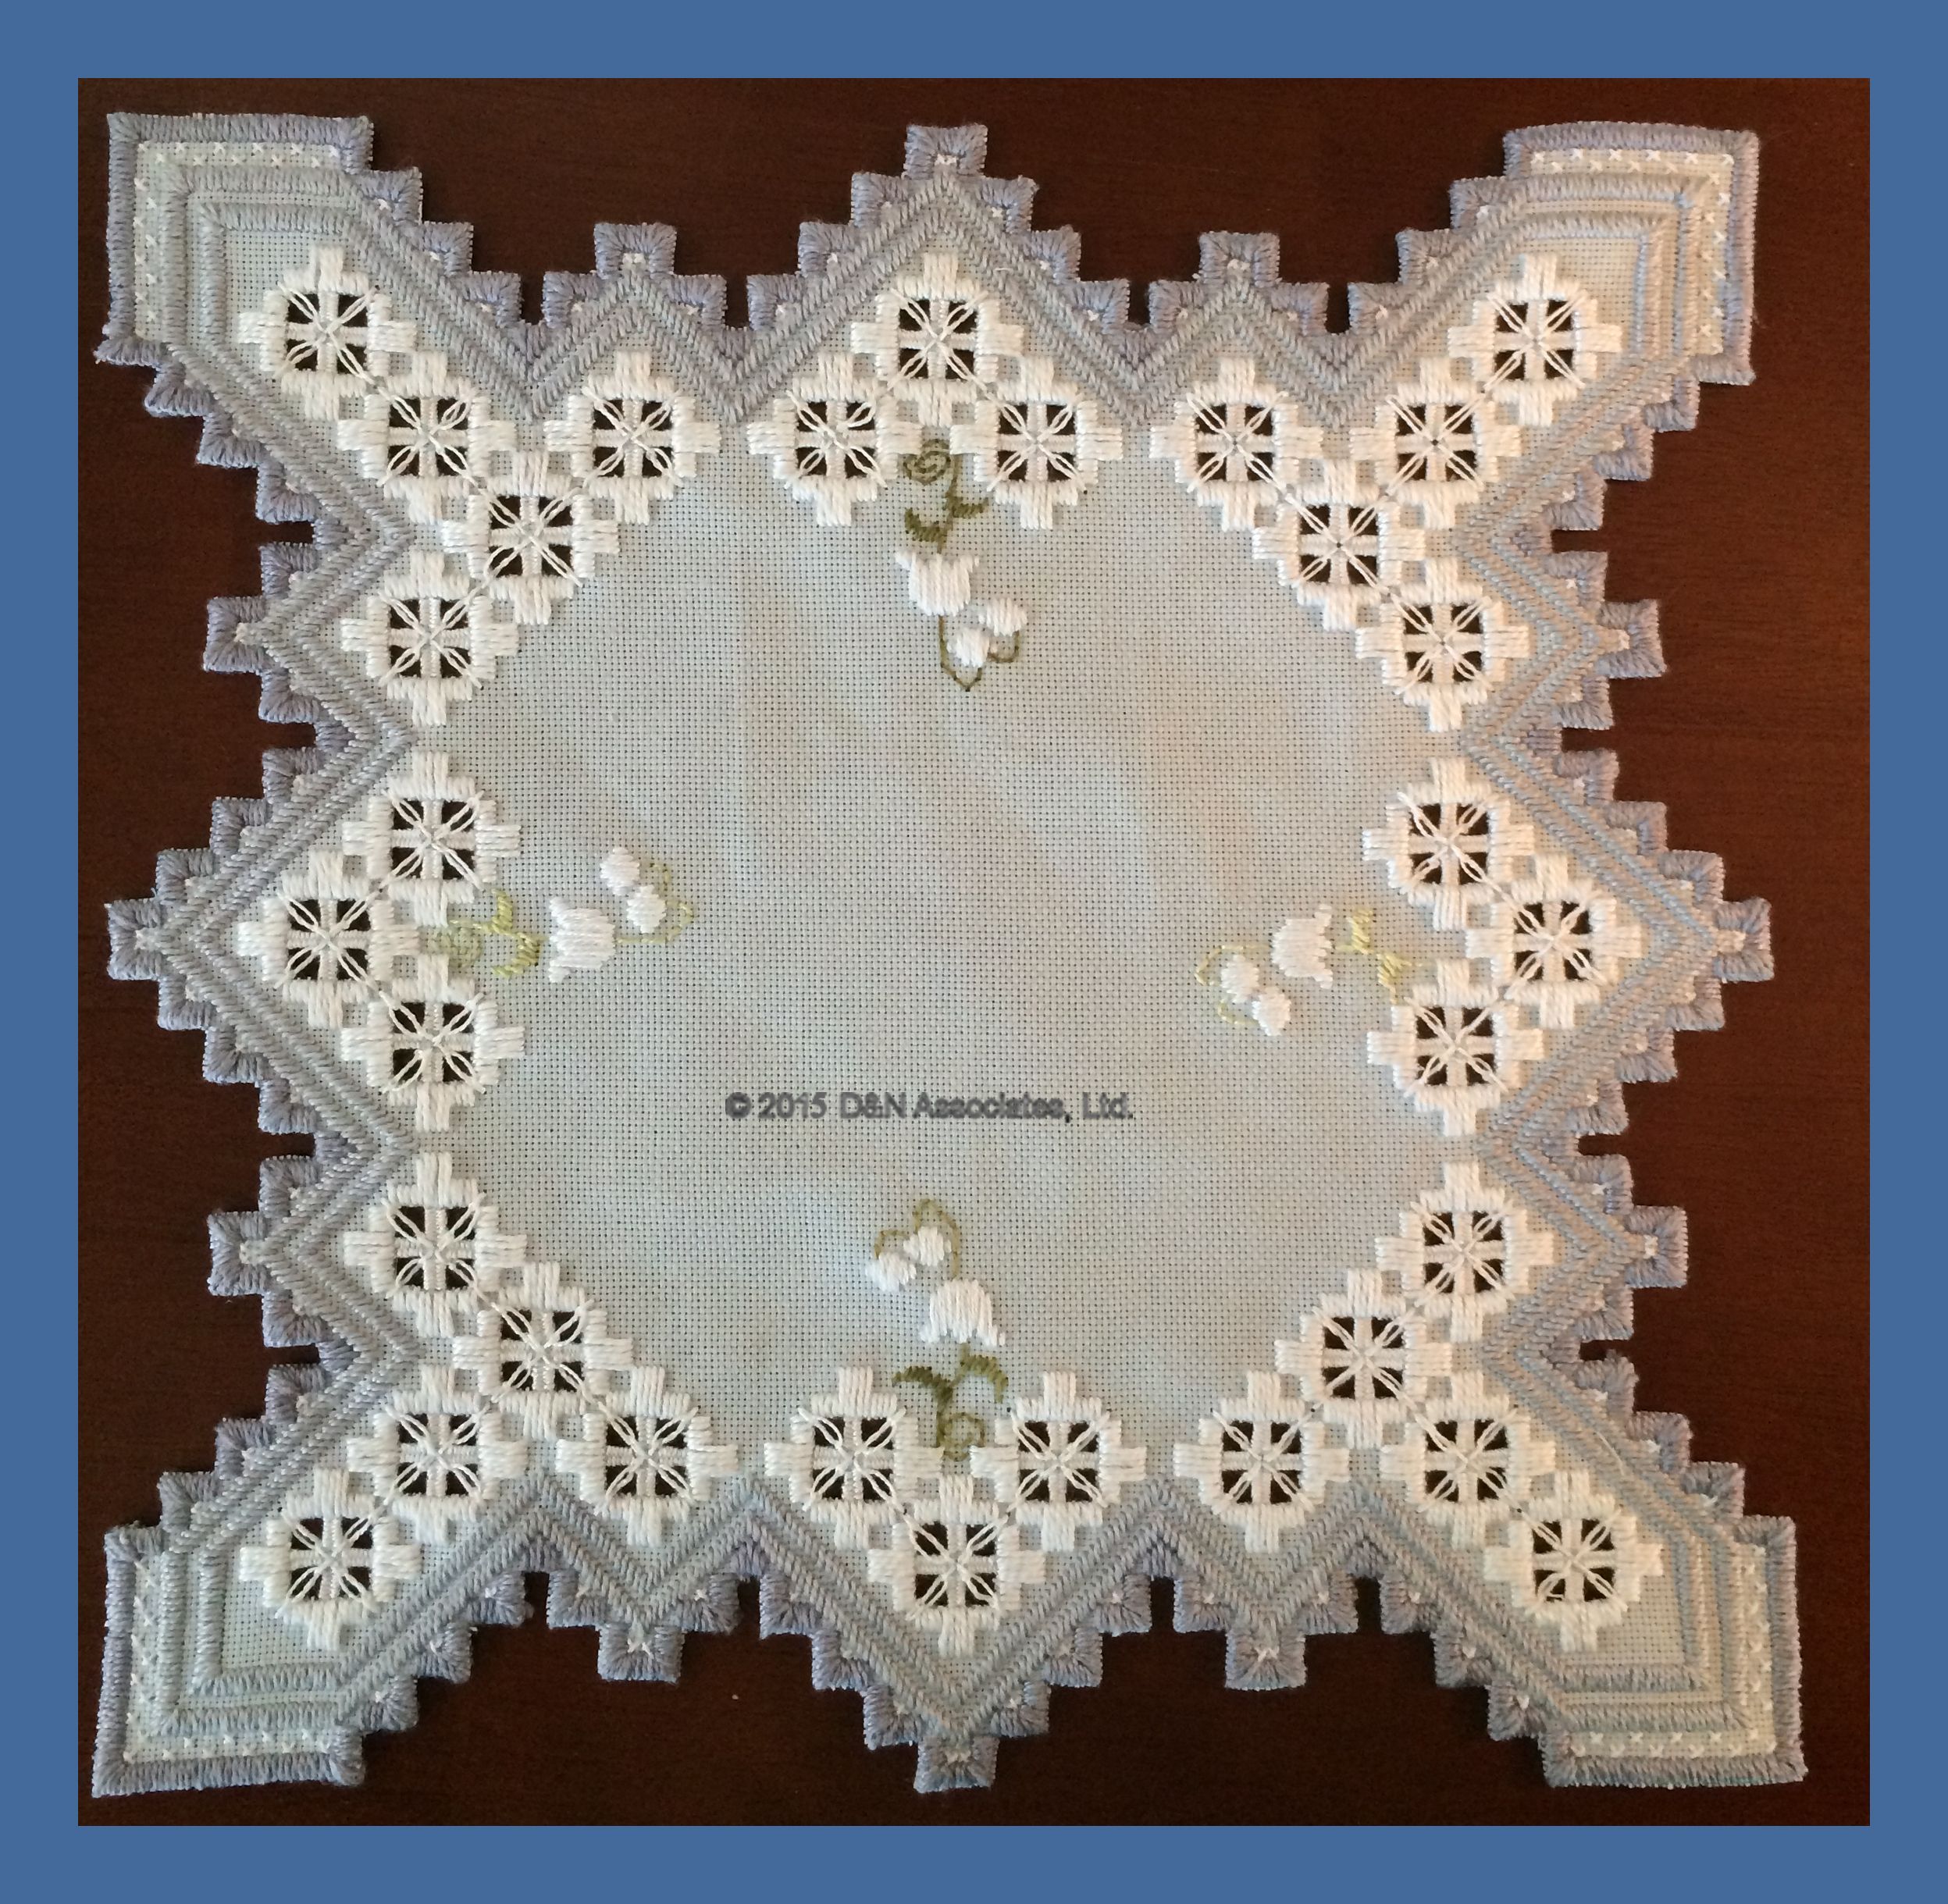
Fabric is water grey 22 count even weave. Finished worked area is 11 inch square. The Hardanger stitching is worked in size 5 and 8 white perle cotton and three shades of grey in size 5 and 8. Perim of Copenhagen design 10-5707 and was purchased as a kit.
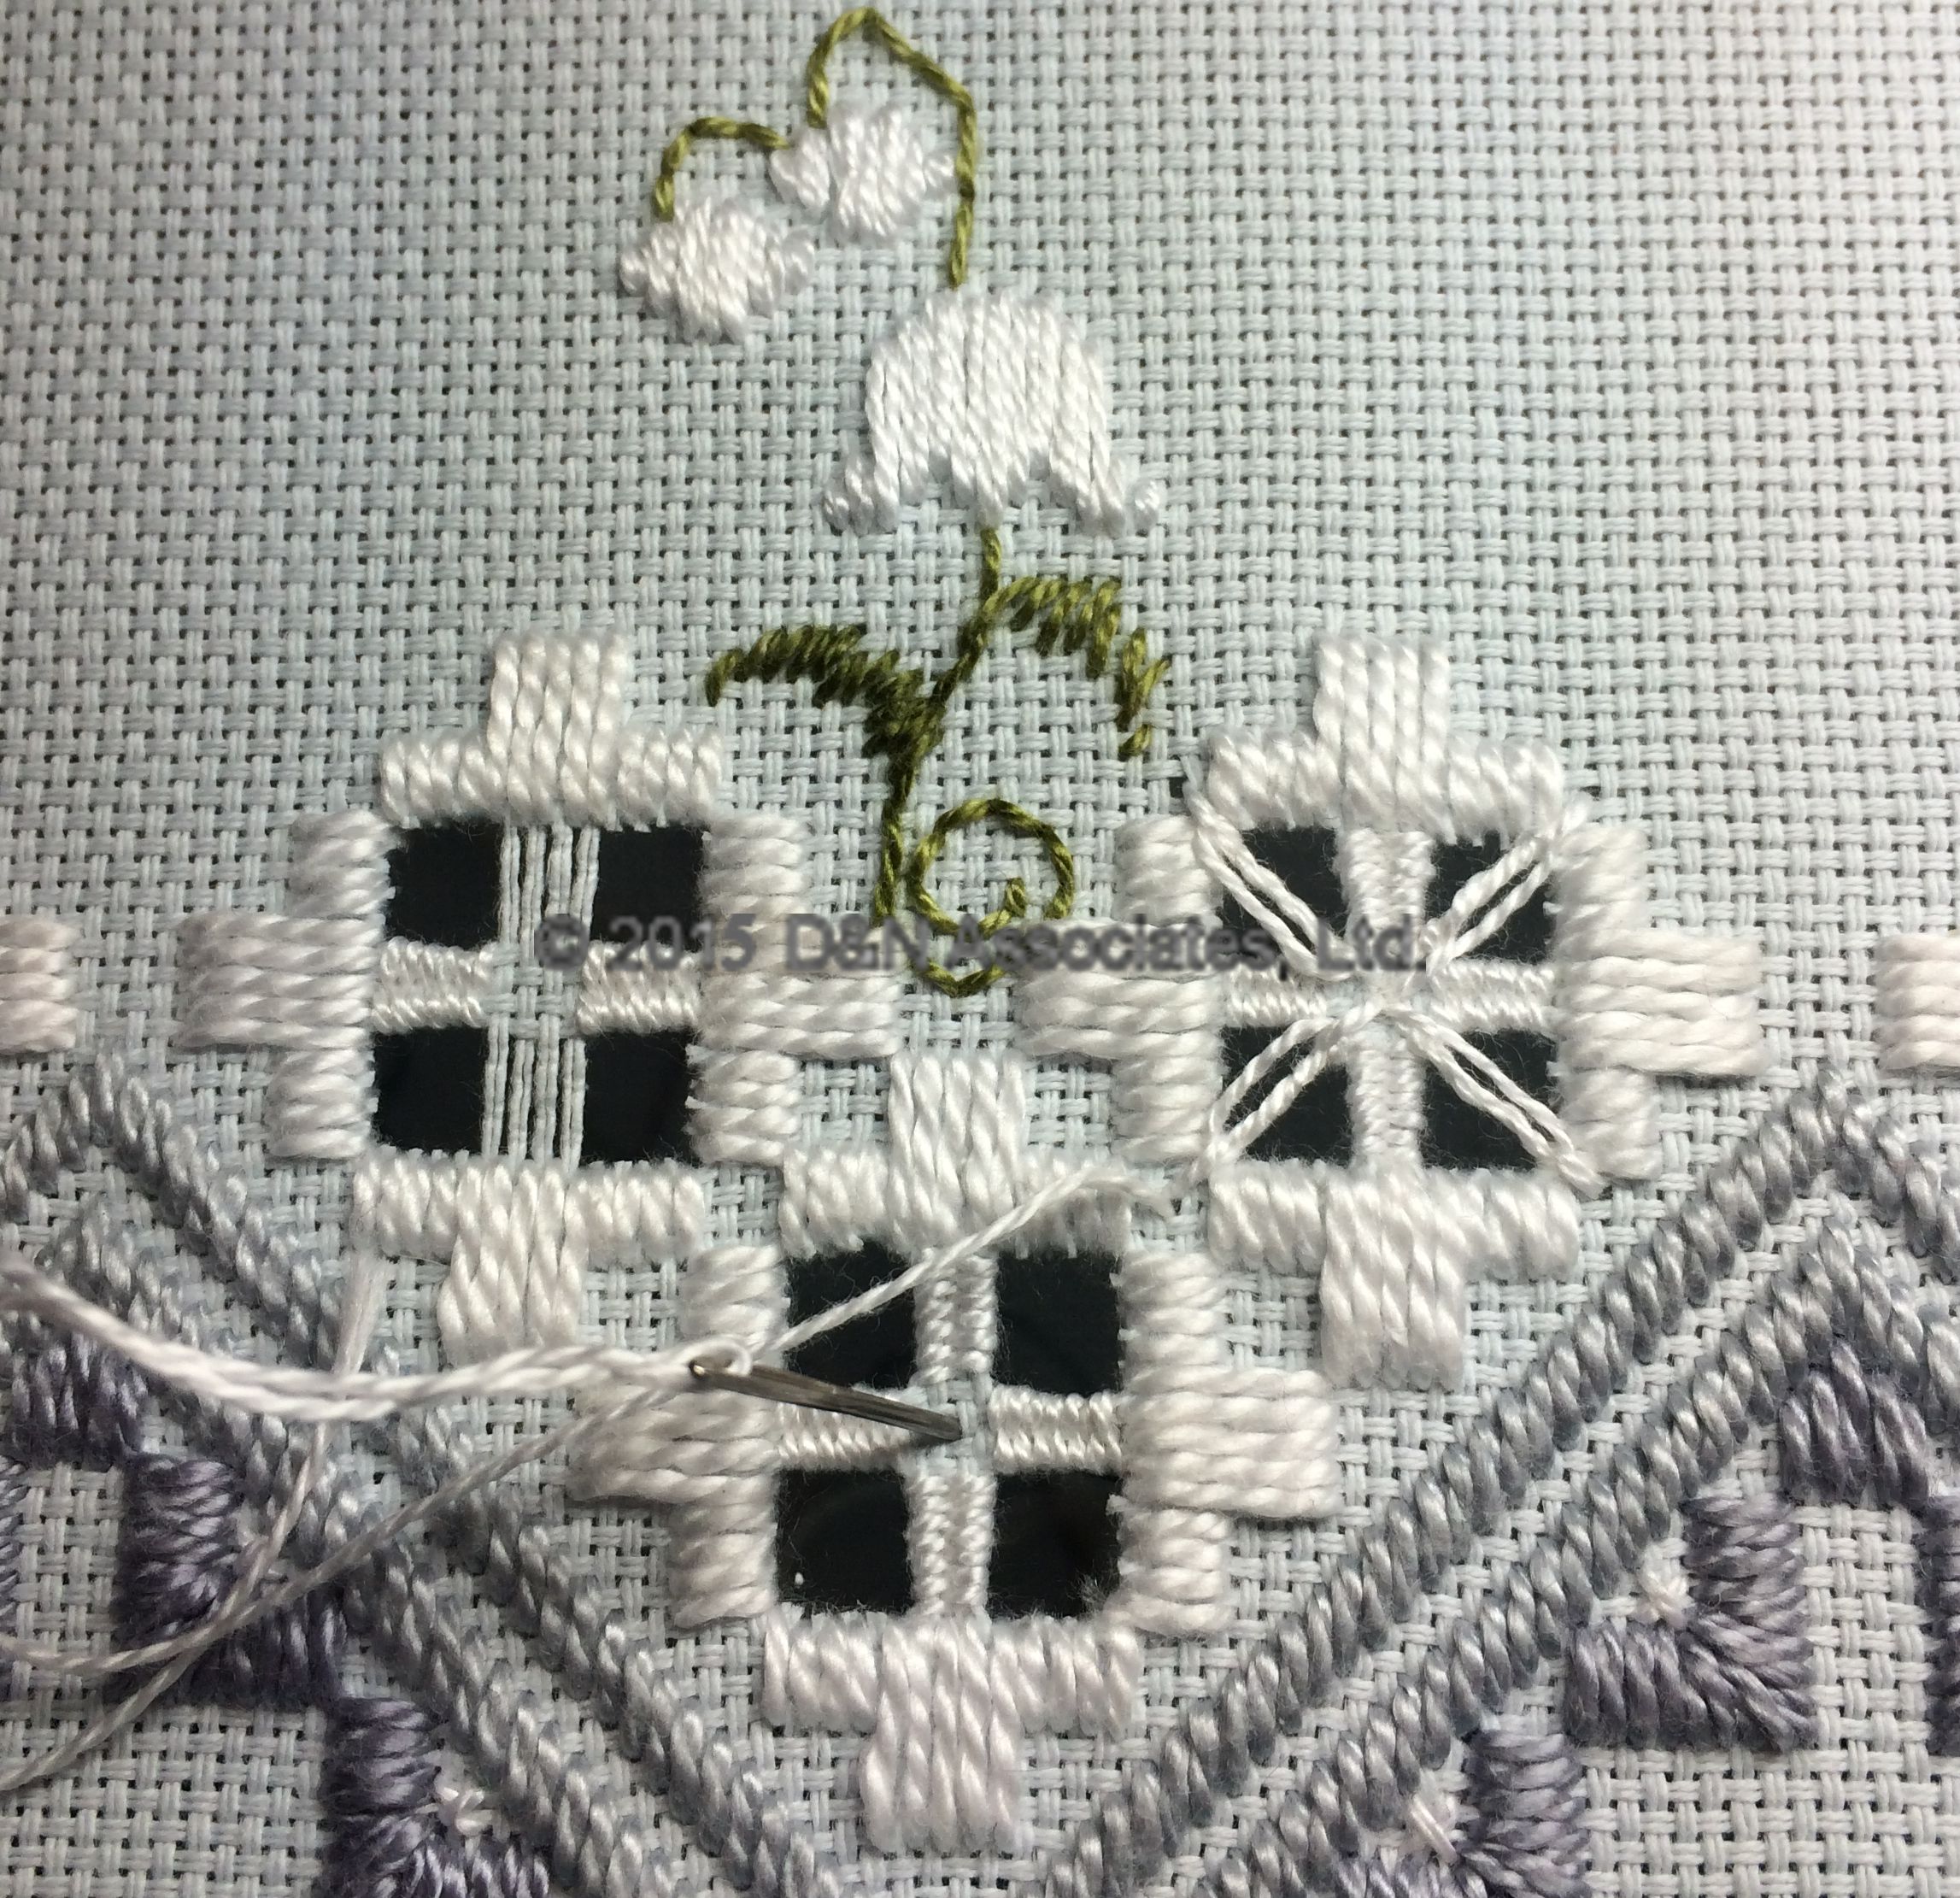
The flowers were worked using two threads of size 8 white perle. The stems for the flowers were worked using size 8 from my stash, a variegated green (color 92).
I wanted a more open design so I only did a small spray of flowers instead of the larger Lily of the Valley pattern that is for this design. Plus I did not do the four large squares of hardanger that was in the design. I also wanted a lazy-daisy stitch look to my kloster blocks. I am sure there is a Hardanger stitch name for these loops within the open area of the kloster blocks, but I see them as lazy daisy loops.
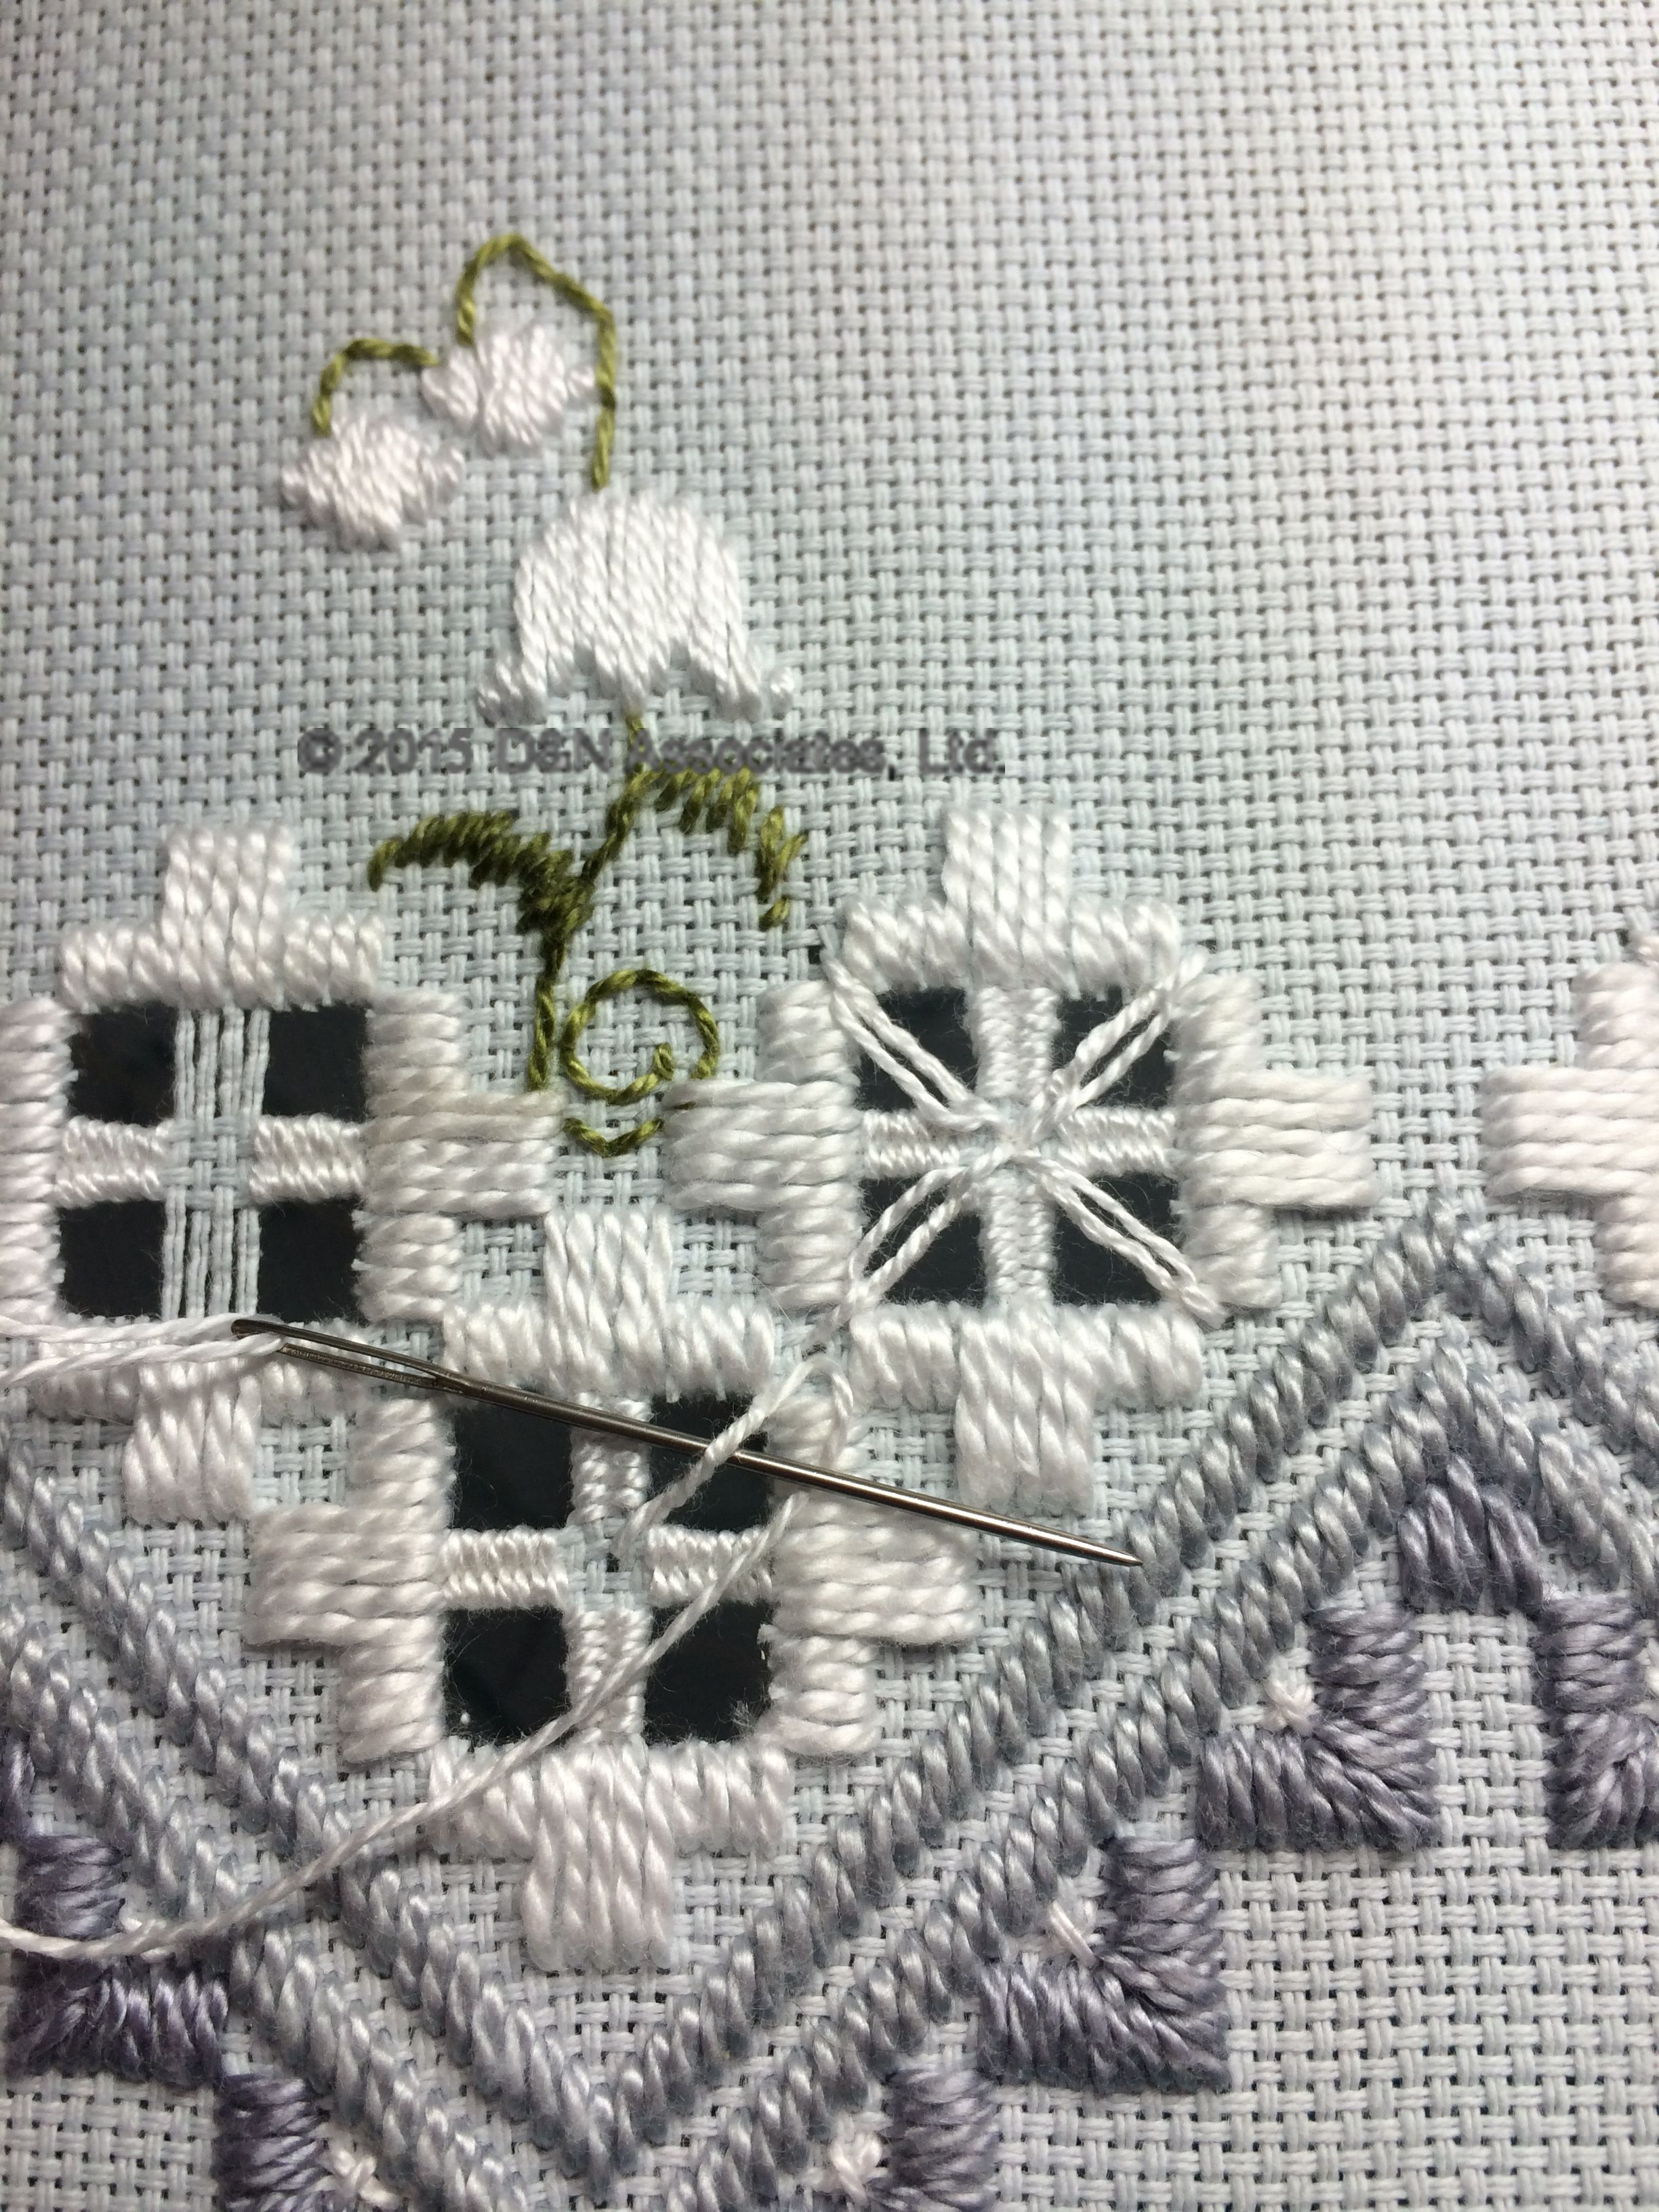
Following are my notes for making the lazy daisy loops: The bottom kloster block shows where I have cut and removed the threads. Within the top left kloster block I have begun to weave and within the top right kloster block I show the four legs weaved and the addition of the lazy daisy stitches within the four open areas. The bottom kloster block shows where I have cut and removed the threads. Within the top left kloster block I have begun to weave and within the top right kloster block I show the four legs weaved and the addition of the lazy daisy stitches within the four open areas. |
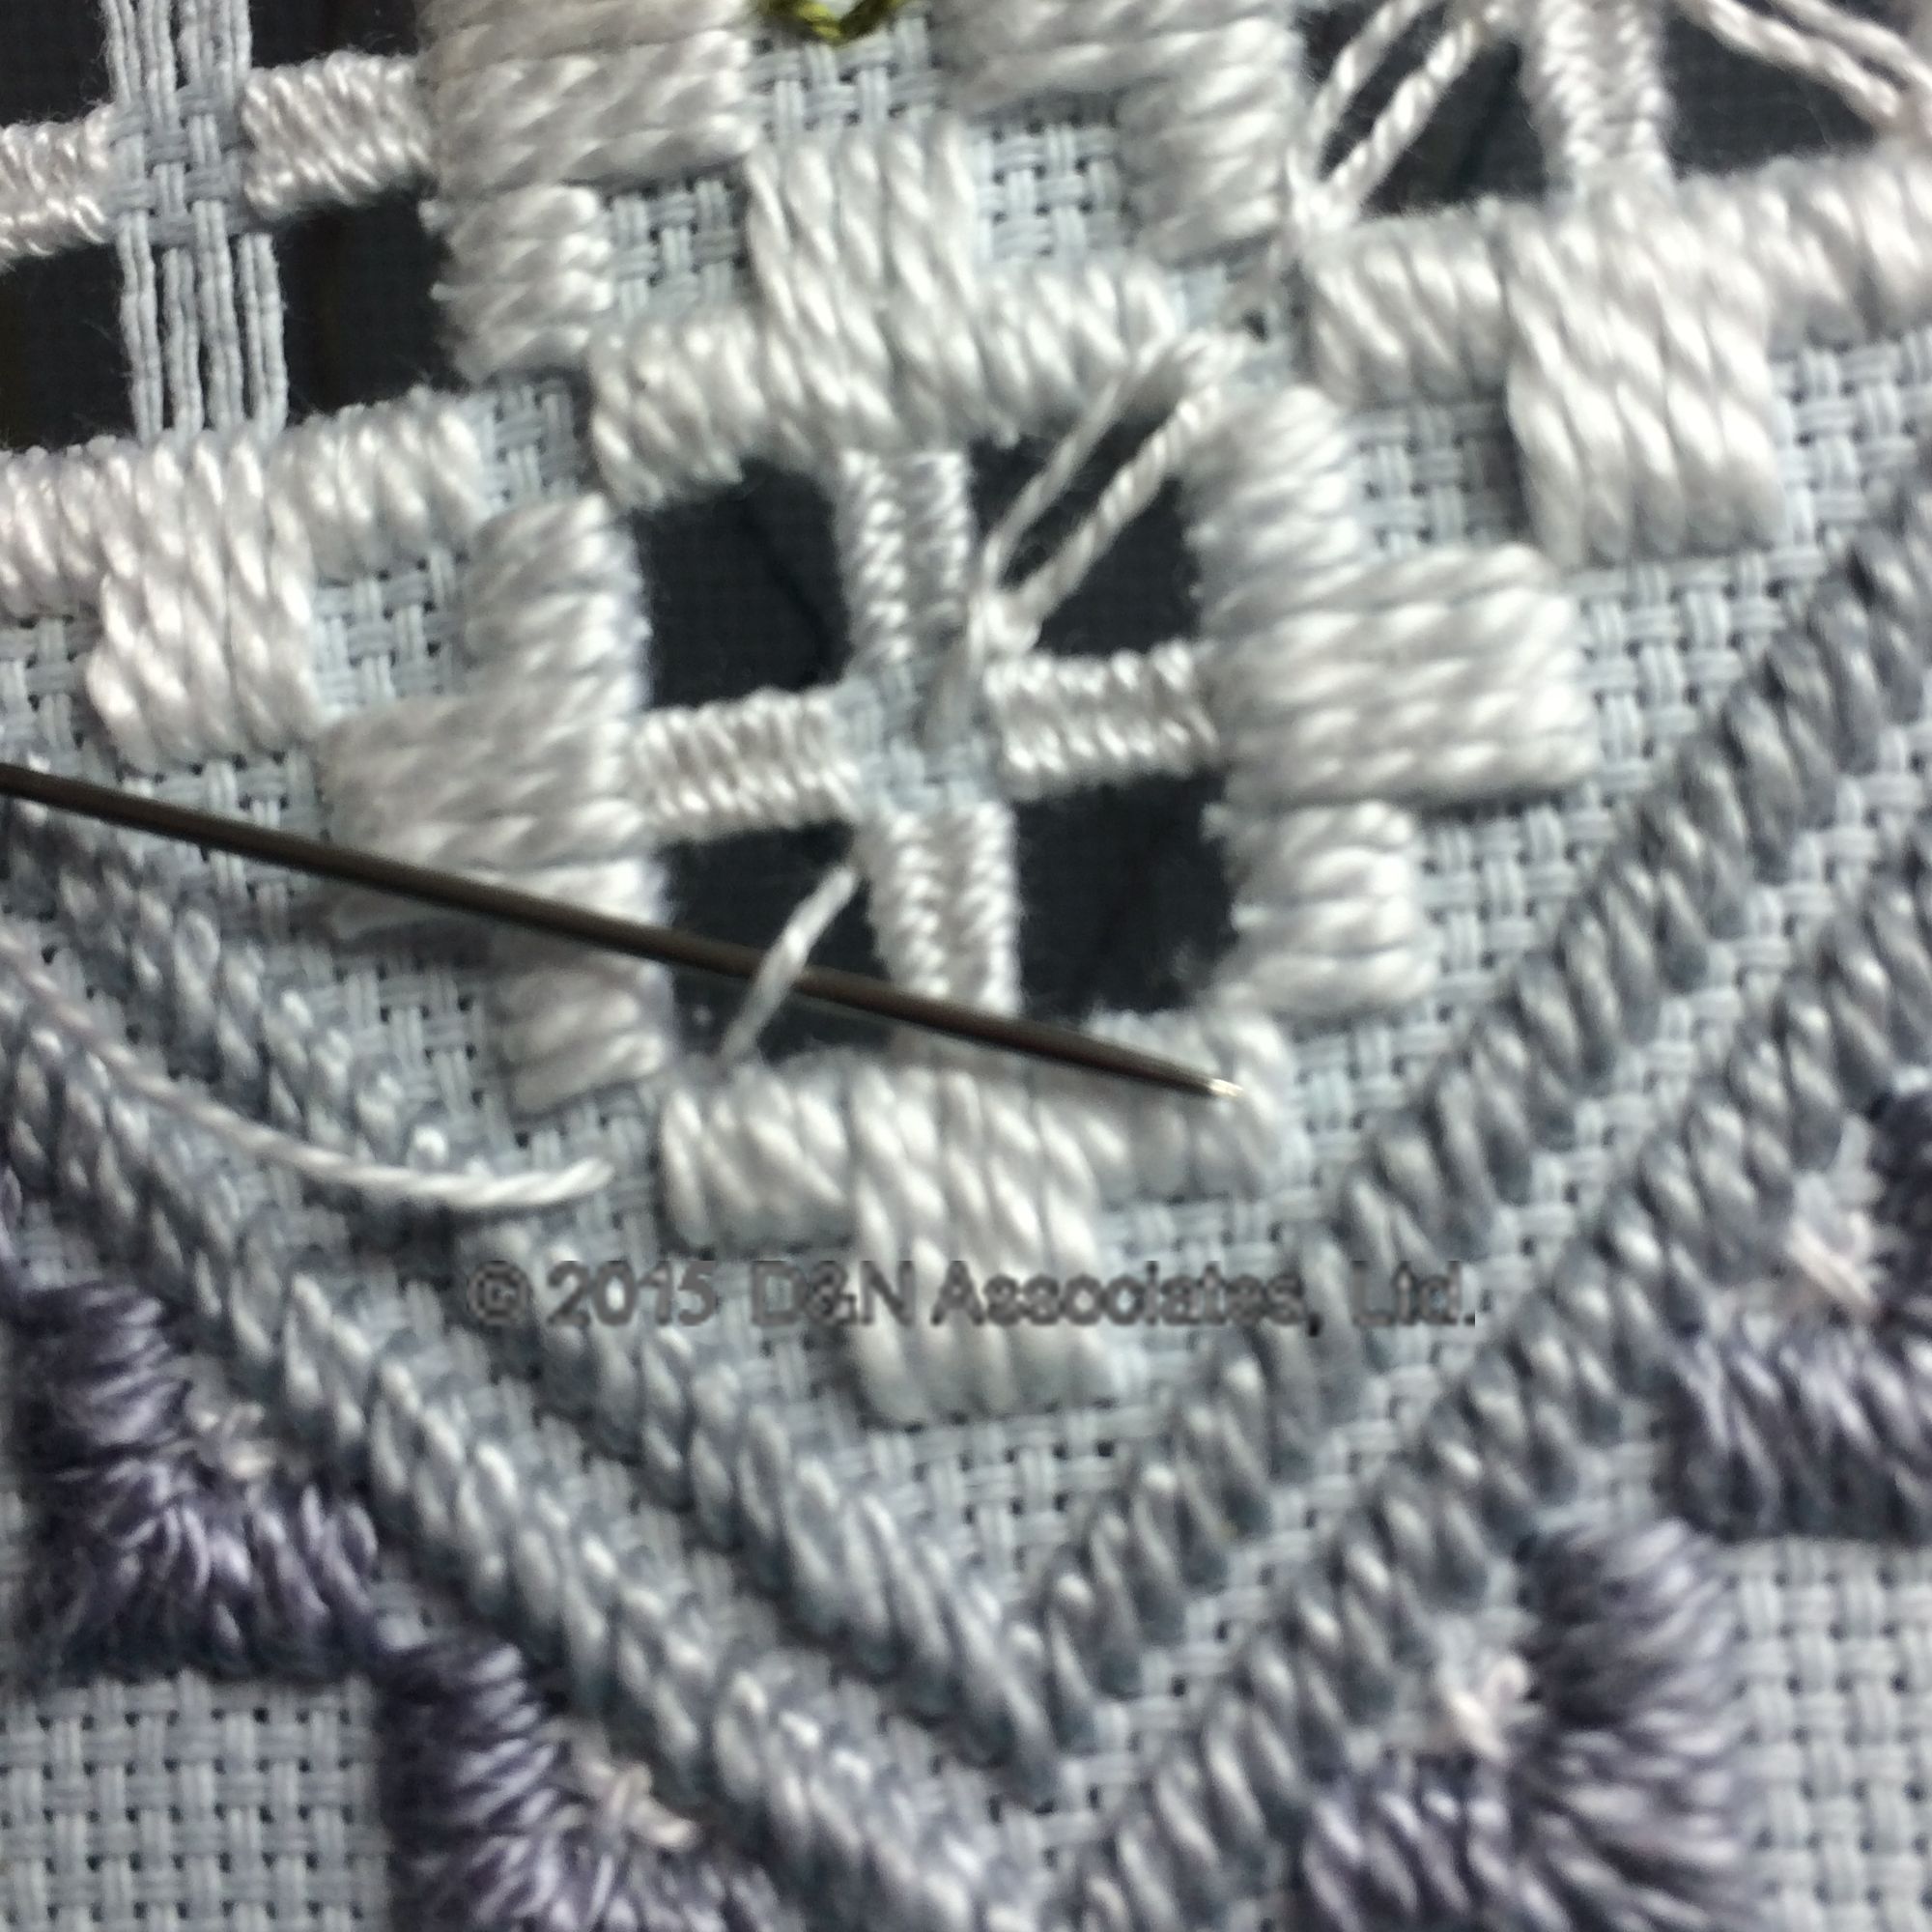
 In this photo I am beginning a lazy daisy stitch by making a wrapped straight stitch. I come up from underneath at an outer corner of the kloster block and take the needle back down in the center of the kloster block so that I can come up in the open area and wrap the thread around itself (see next photo). In this photo I am beginning a lazy daisy stitch by making a wrapped straight stitch. I come up from underneath at an outer corner of the kloster block and take the needle back down in the center of the kloster block so that I can come up in the open area and wrap the thread around itself (see next photo). |
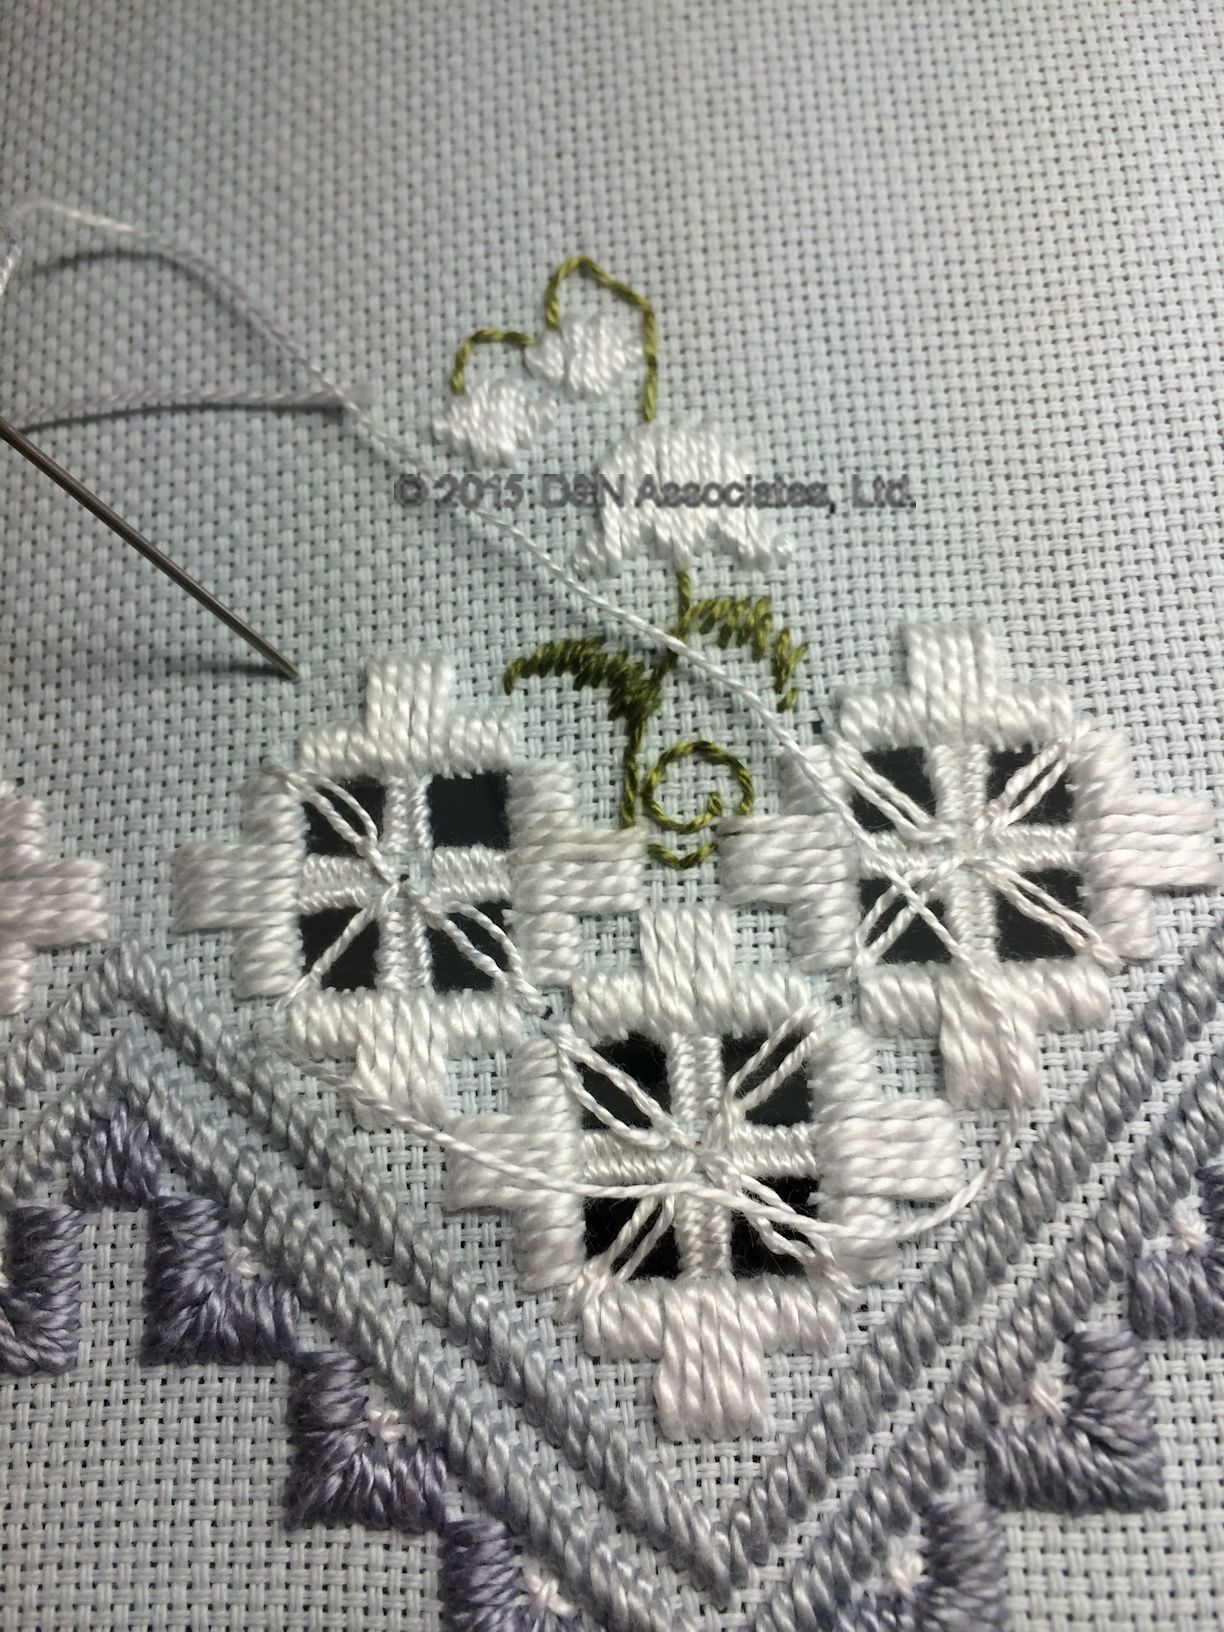
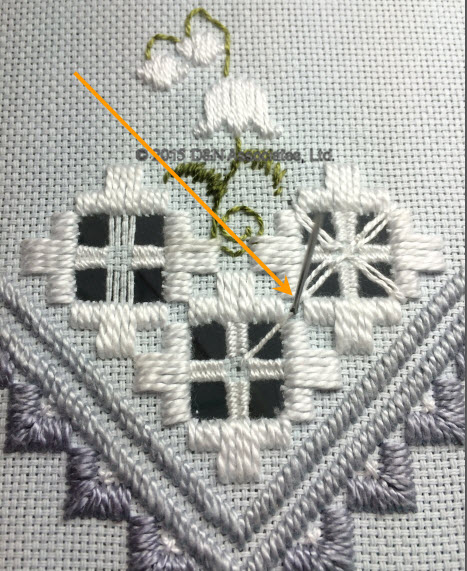 If you look closely at the thread that is in the open area (of the kloster block in which I am currently working) you can see that I have twice wrapped the thread around the original straight stitch (from outer corner to the center of the block). I want to end that wrapping of the straight stitch with my needle behind the fabric then I bring the needle back up at the same outer corner of the kloster block. (See the orange arrow). If you look closely at the thread that is in the open area (of the kloster block in which I am currently working) you can see that I have twice wrapped the thread around the original straight stitch (from outer corner to the center of the block). I want to end that wrapping of the straight stitch with my needle behind the fabric then I bring the needle back up at the same outer corner of the kloster block. (See the orange arrow). |
 Here I am making the first loop for the lazy daisy stitch. Here I am making the first loop for the lazy daisy stitch. |
 The orange arrow points to where I have snug the thread to form the beginning of the lazy daisy stitch and the blue arrow points to the end of the lazy daisy loop. The orange arrow points to where I have snug the thread to form the beginning of the lazy daisy stitch and the blue arrow points to the end of the lazy daisy loop.
If you note in the last photo the thread is wanting to curve clockwise and in this photo the thread naturally wanted to lay counter clockwise. I had at first through I should keep the curve of the thread the same for the top and bottom stitch of the lazy daisy loop but found this make the loop twist back on itself. Then I thought well, I’ll start all of the beginning stitch with the thread curve clockwise and do the bottom counter clockwise but I eventually realized (after doing most of these filling stitches for the kloster blocks that the thread itself wanted to curve clockwise or counter when I brought it up from underneath. |
 To finish the lazy daisy loop I take the needle back down at the center of the kloster block. To finish the lazy daisy loop I take the needle back down at the center of the kloster block.
|
|
|
 I eventually noticed as I worked on the lazy daisy loops that when I brought the thread up from underneath it wanted to curve clockwise or counterclockwise. I eventually noticed as I worked on the lazy daisy loops that when I brought the thread up from underneath it wanted to curve clockwise or counterclockwise.
If you recall when I am first starting this lazy daisy loop that I do a straight stitch and then come back from underneath, do two wraps (of the thread) around the straight stitch. My guess is that whether I do that double wrap clockwise or counter is what controls how the thread behaves (wanting to curve clockwise or counter) when I bring it up through the fabric to do the loop of the lazy daisy. Also I did try putting the loop of the lazy daisy over an unwrapped straight stitch but found I like the look better if the one side of the lazy daisy loop was the wrapped straight stitch. |
 |